Multiple Boxes for Customers
When customers sign up for your subscription-based business, they select a box to subscribe to. Customer accounts can only be subscribed to one box at a time, but there are cases where a customer may want to have multiple boxes in one order. By creating new products in your Shop that link to boxes, you can allow customers to add more boxes to their order as additional items.
Let's say a customer is subscribed to a "Small" box, but they also want to receive a "Large" box in addition on the same order.
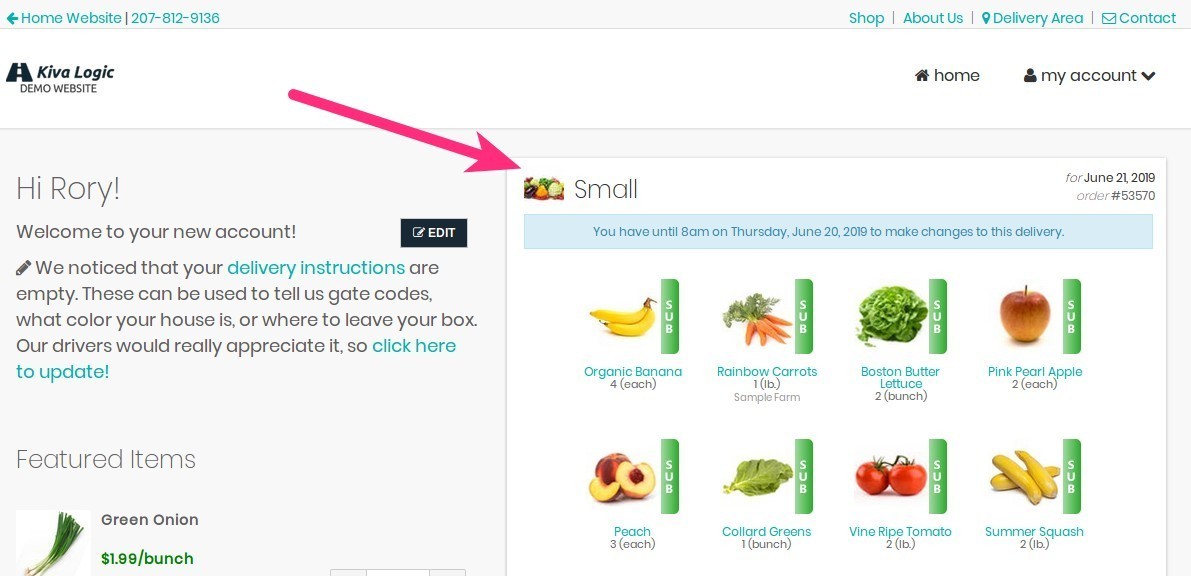
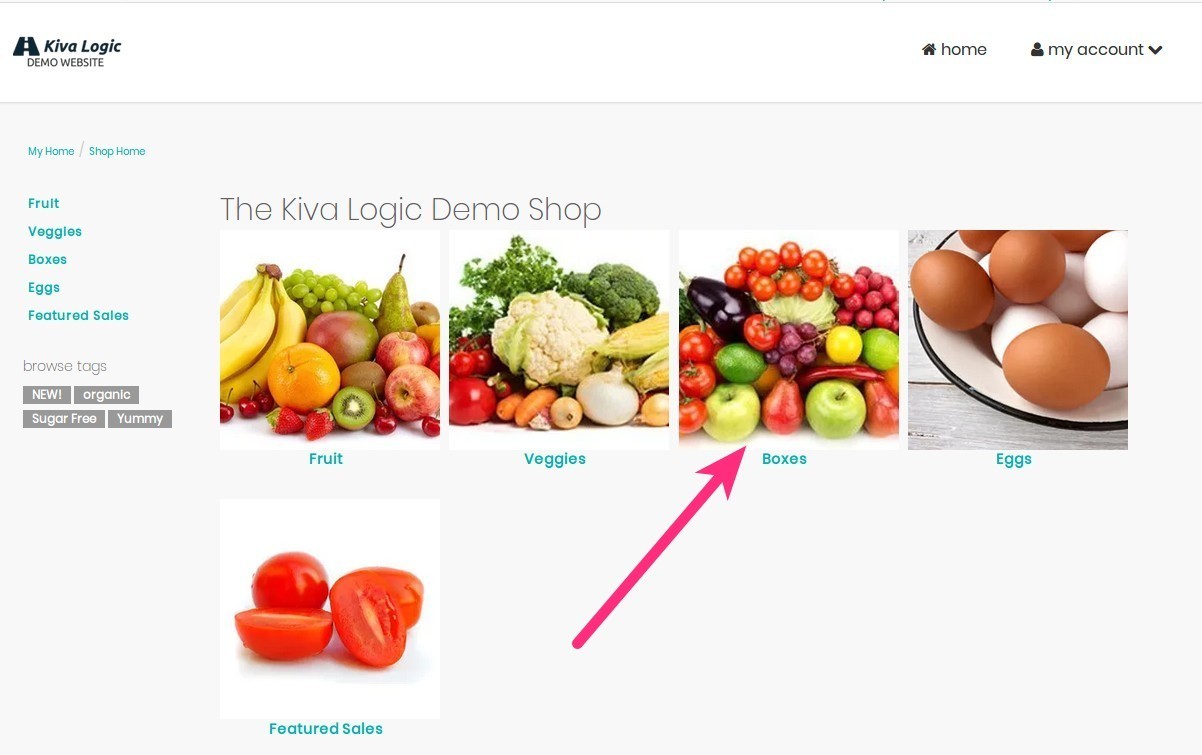
The way to do this is to create a new shop category that will allow customers to add any of your boxes as additional items to their order just like if they were adding on extra Bananas or Apples.
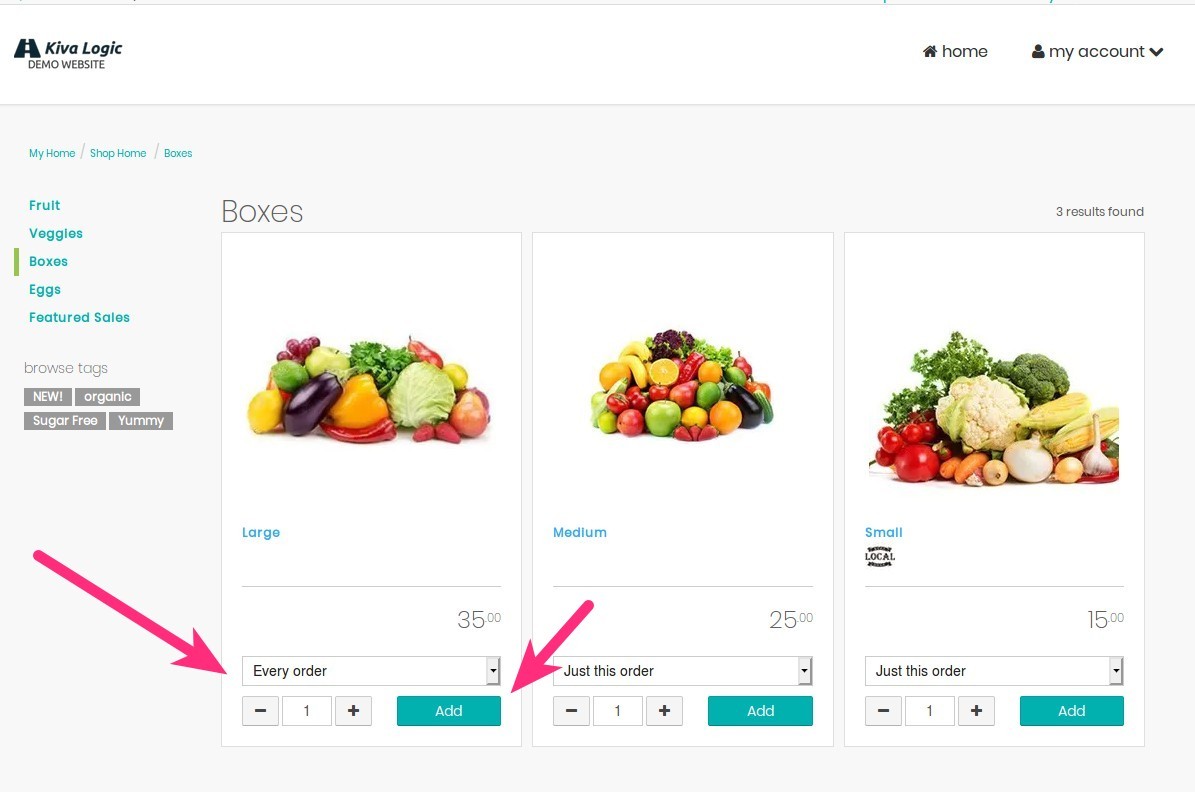
Just like any other product in the shop, they can elect to receive an additional box for just the current week's order, every order, or every other order (scheduling options depend on your system settings.) For this example, we'll select every week, and then add the large box to our order for the week.
When the customer browses back to their home page, in addition to their normal 'Small' box, they'll also see a 'Large' box that has been added. They can still make subs in the 'Large' box add-on as well!
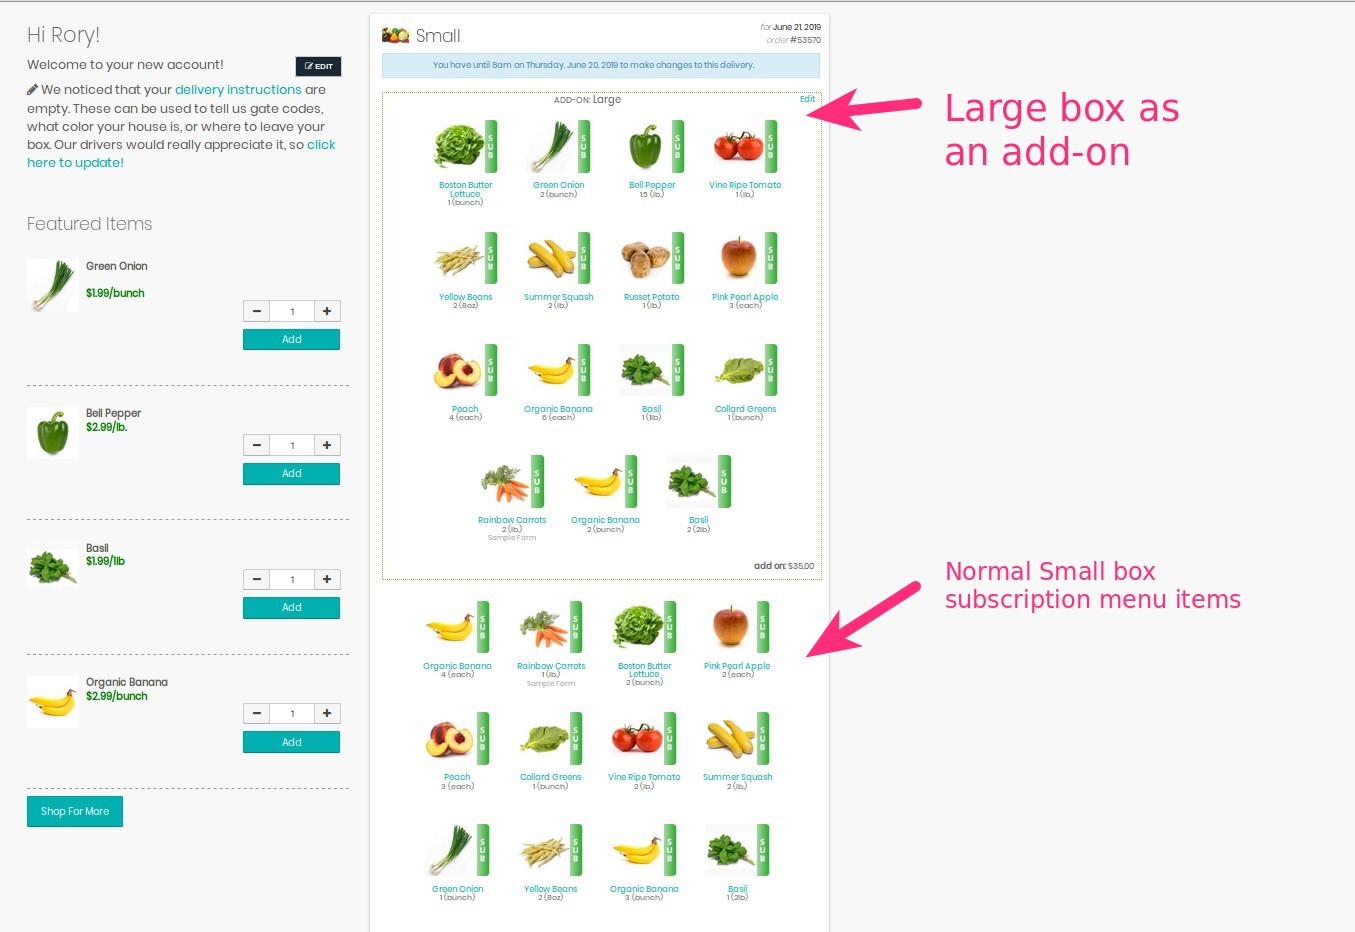
If the customer changes their mind, they can delete the large box and/or update their recurring product settings for the box just like any other additional item available in your shop.
Set Up The Boxes Shop Category
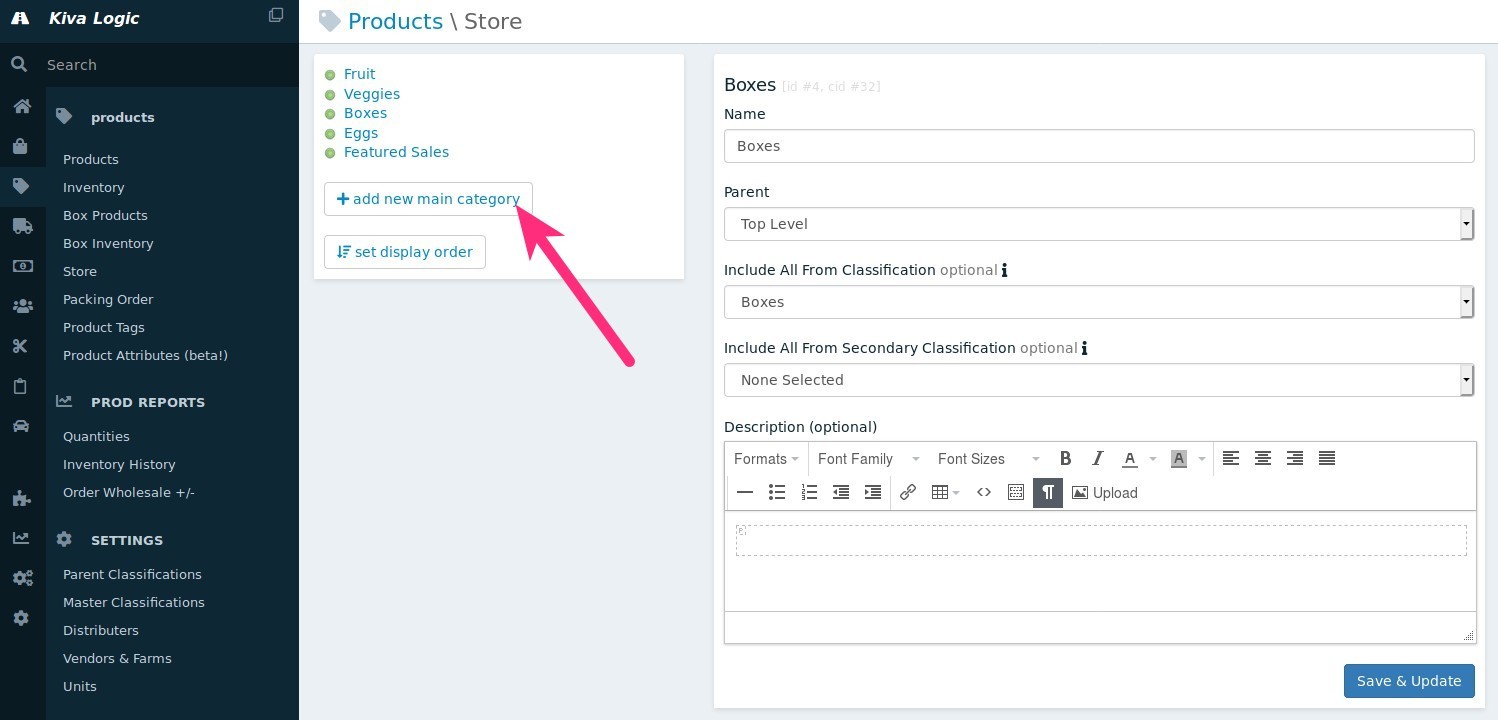
On the admin side, go to Products->Store. Click on 'Add new main category', then fill in the information for the new "Boxes" store category that you want to create.
Set Up Boxes as Products in the Shop
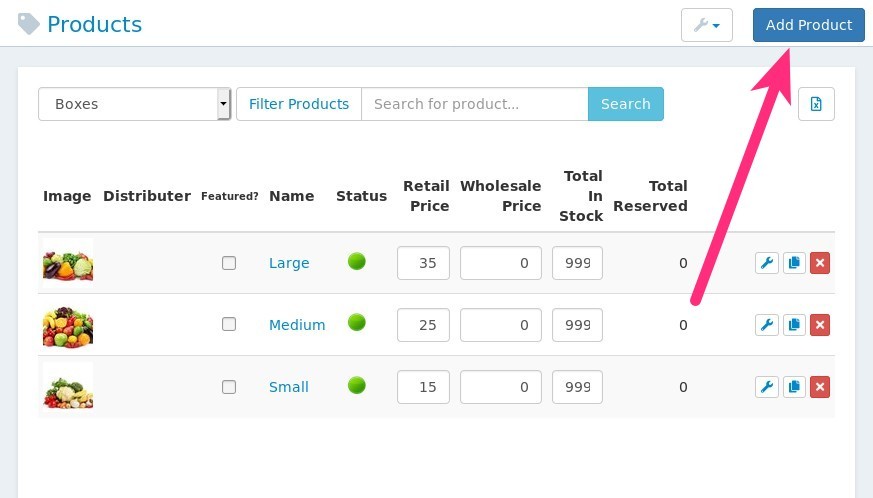
Next we need to create products that represent the boxes so they will show up in the shop for customers to purchase as add-ons. First, go to the main Products page on the admin and click 'Add Product' at the top right.
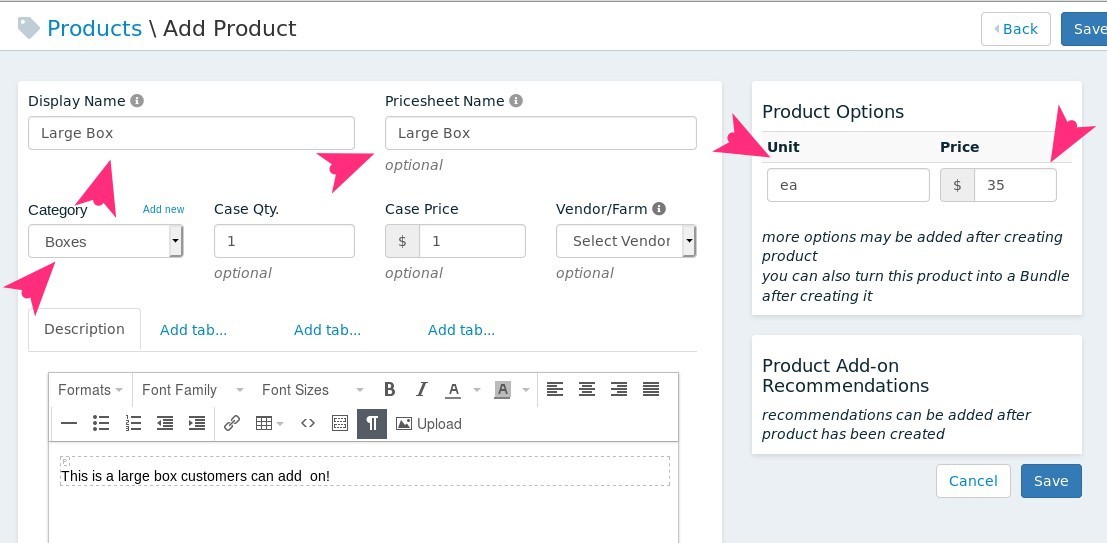
Enter in the Display Name, Pricesheet Name, select the new category 'Boxes' (or whatever you named the new shop category), then under product options enter in the unit and price of the box. For unit, you could use 'each', 'ea', 'box', or anything else that you feel best describes the product. For the case qty and case price, you can just enter in '1' and '1' if you want. Don't hit 'save' yet, there is one more thing you'll need to do.
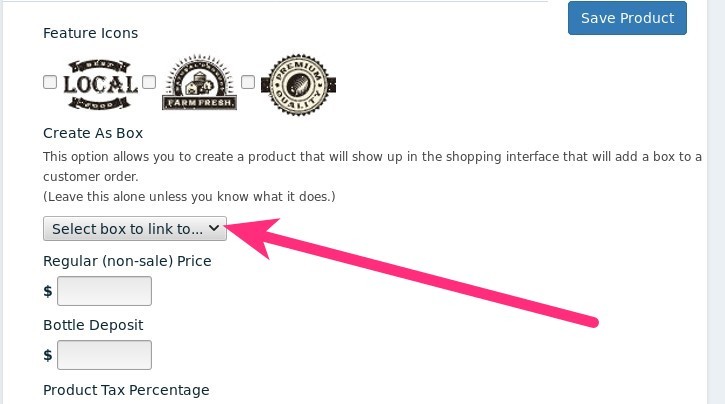
This is the crucial step, so don't skip this! Now we have to link the new product to the actual Box we have so the system knows this is not just a normal product, but a product representing an actual box.
Scroll down the page and click on the 'Advanced' button. Then, in the dropdown box that says "Select box to link to...", select the correct box for this new product.
Now click "Save", and you are done!
Inventory Things to Know
In order for your new product to be available for purchase as an add-on, a few conditions must be met:
The number in stock for the box product must be higher than the number reserved
- The number in stock for EACH of the menu items in the box must be higher than the number reserved.
If those conditions are not met, then the box will show up as 'sold out' in the shop for purchase as an additional item.
Boxes auto-linked to sign up page for non-customers
If a visitor to your website is not a customer, when they view a "box" in the shop, the Kiva Logic software will display an 'Order Now' button that will funnel the potential client into the sign up process. This is useful for people who are browsing the site to try to convert them into paying customers. The 'Order Now' button will ALWAYS be displayed, regardless of in stock numbers because we want to get that visitor to sign up to become a customer!
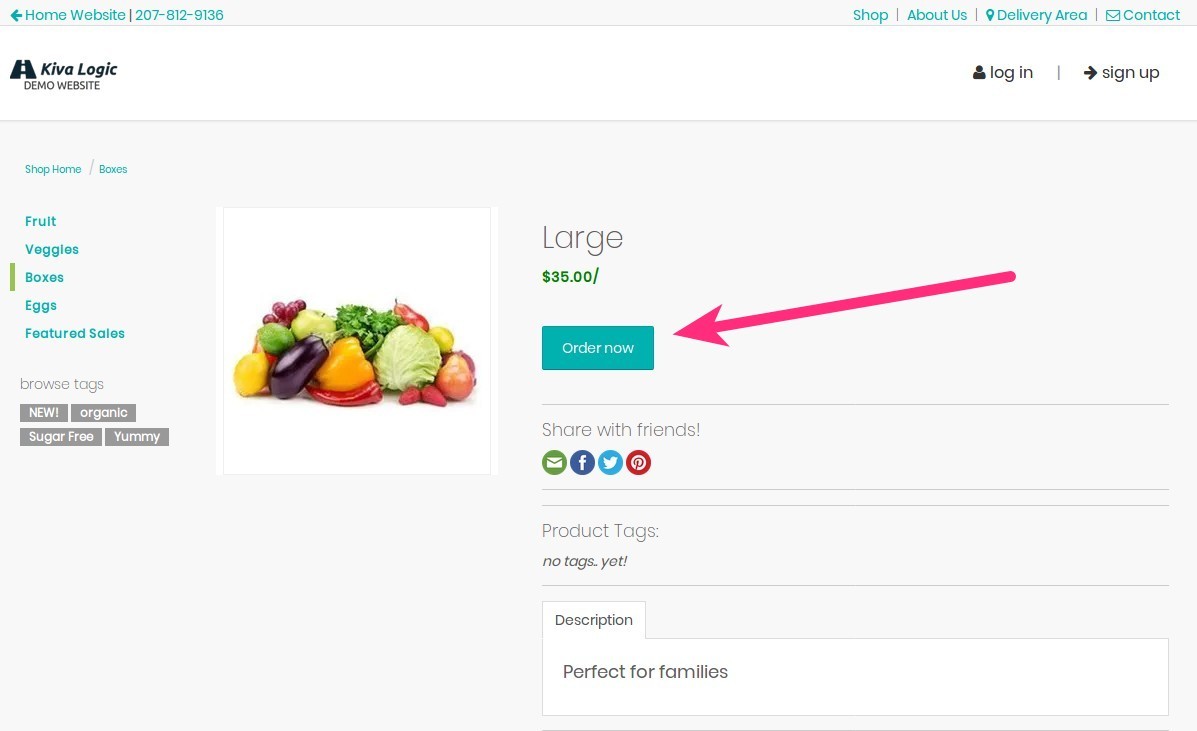
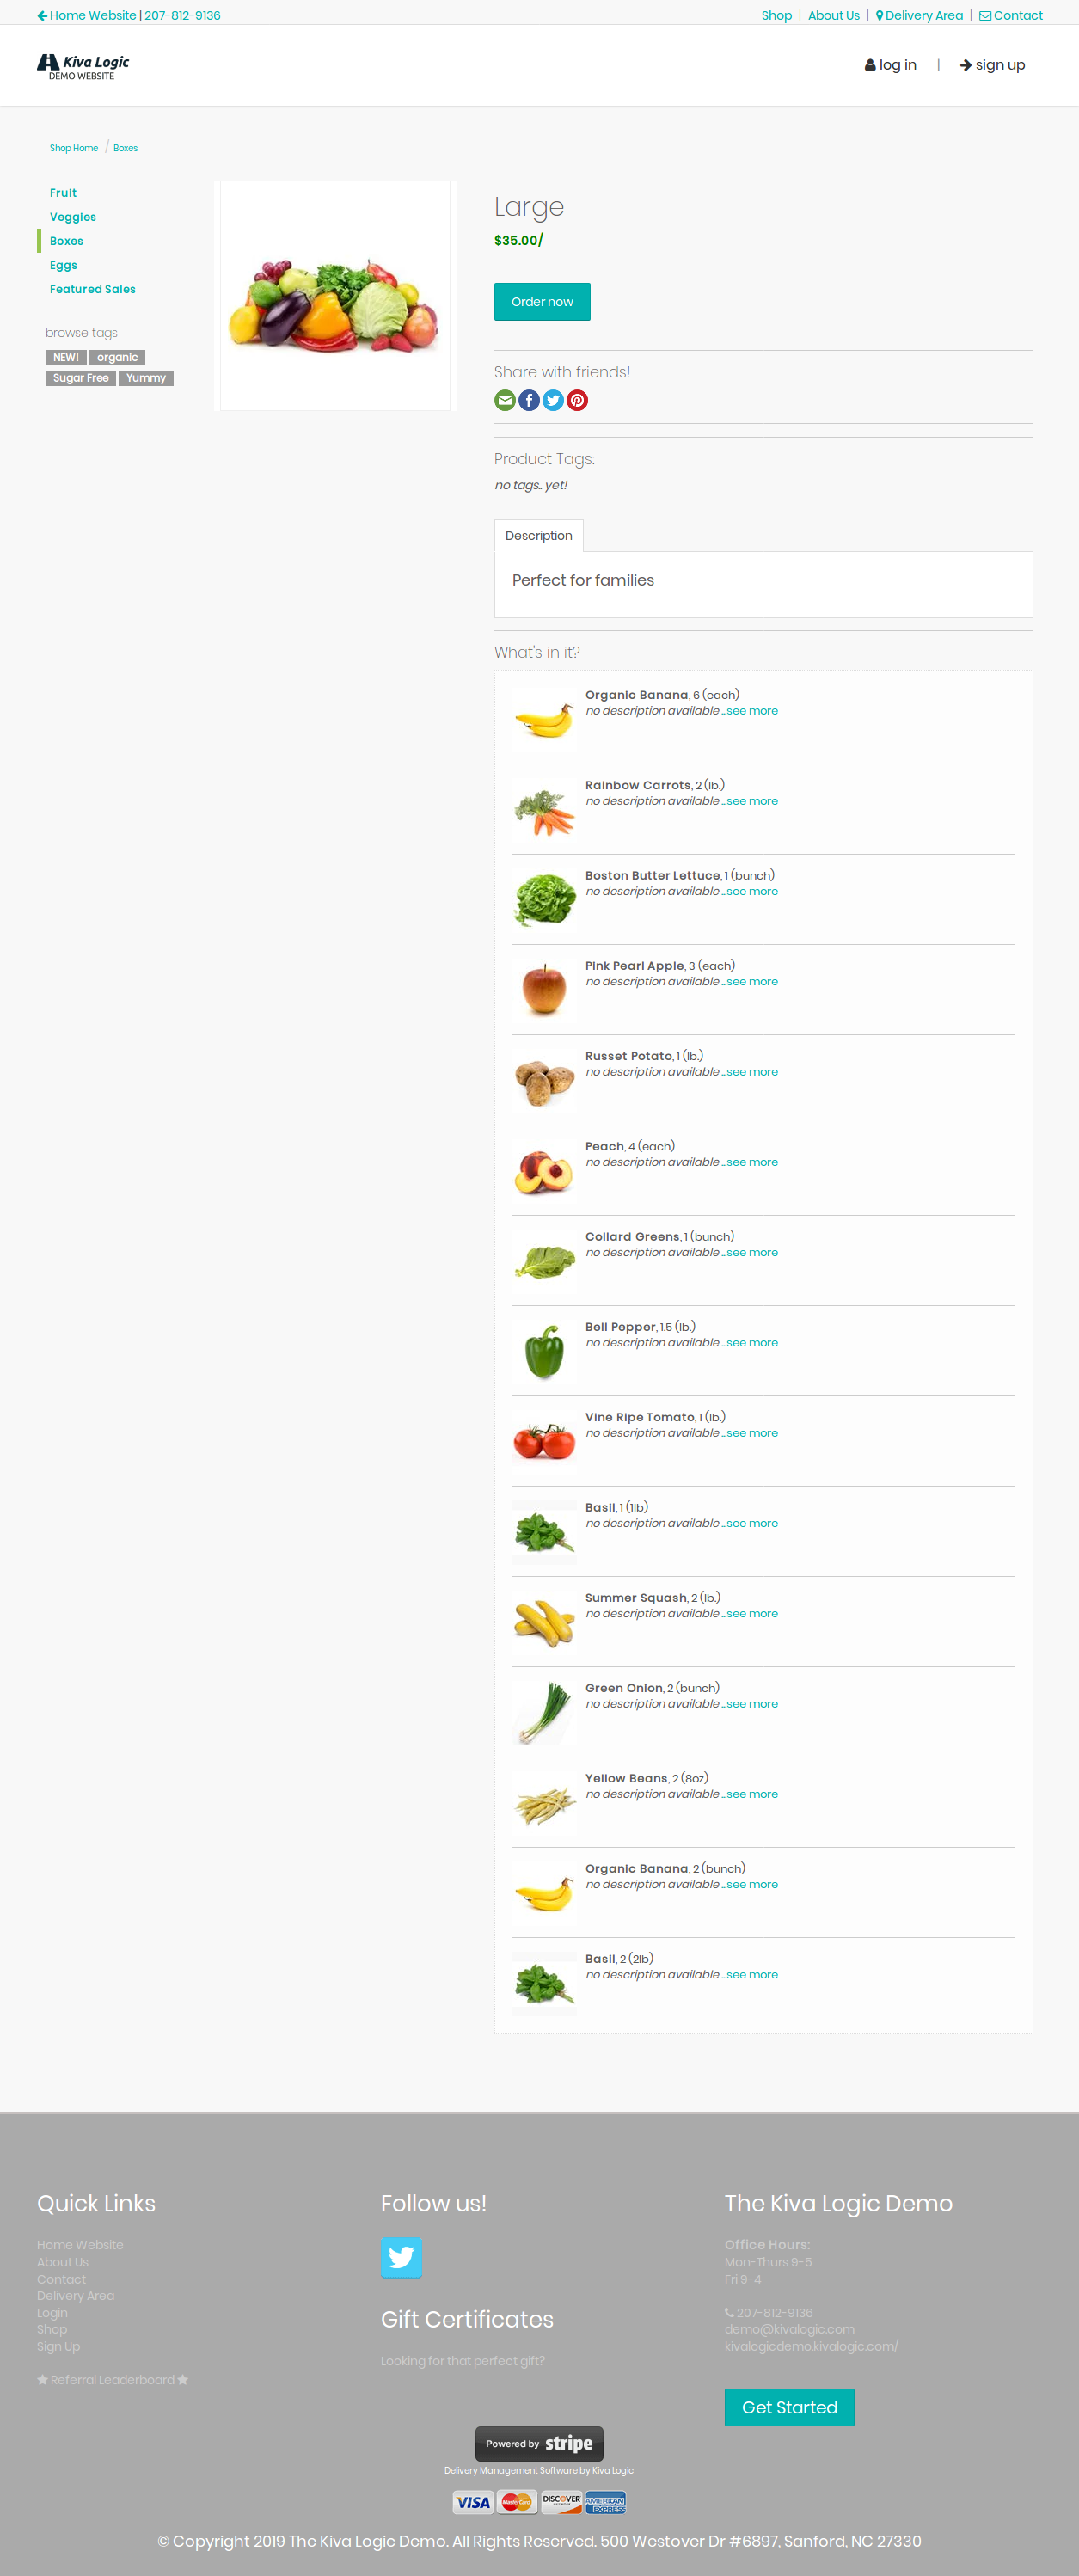
Here's an example of what the full shop item page looks like for a box product. You'll notice it differs slightly from normal shop item pages because it includes a section called "What's in it?".
If you have any questions, write an email to hello@kivalogic.com
