Preferences
Preferences allow your customers to set what they do not like. When the software generates an order, if any of the products on the box menu are on the customer's 'no' list, the software will automatically try to find a suitable replacement based on your wholesale cost.
Setting Which Parent Classifications are Displayed on the Love/Hate page
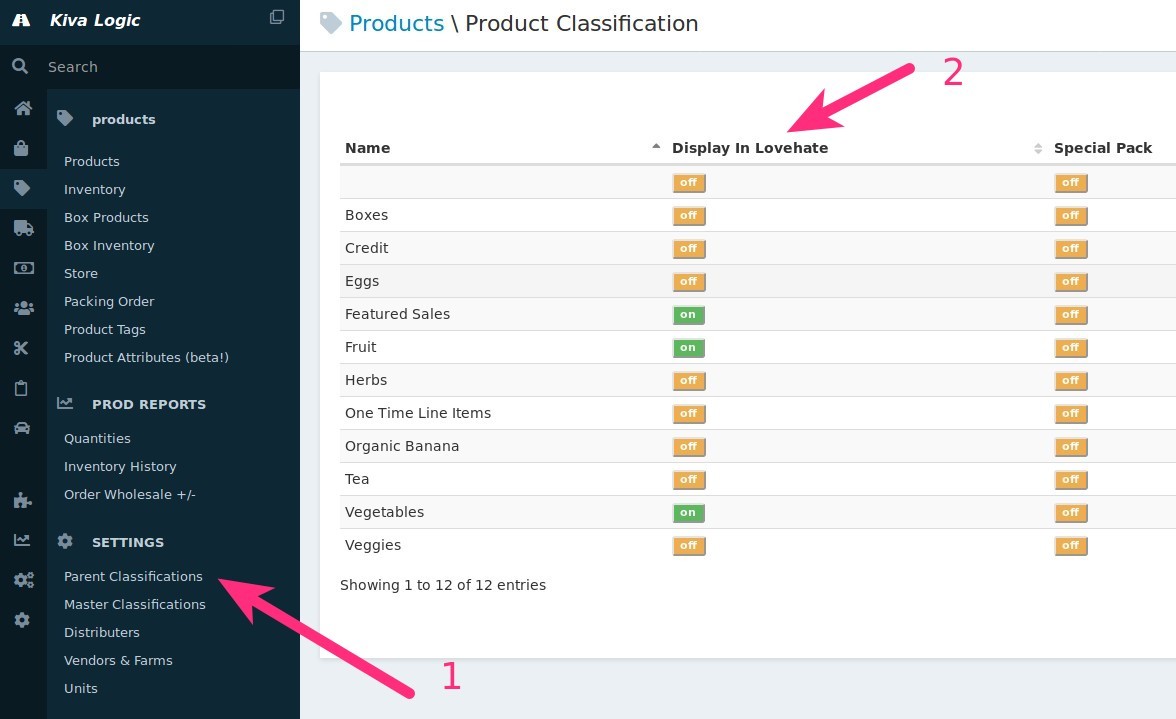
To set which parent classifications are displayed on the love/hate page, on the admin side navigate to Products->Parent Classifications (1).
Under the 'Display in Lovehate' column (2), simply click on or off next to each Parent Classification. "Off" means you do not want it displayed, while "On" means that you do want it displayed.
How to Find the Love/Hate Page
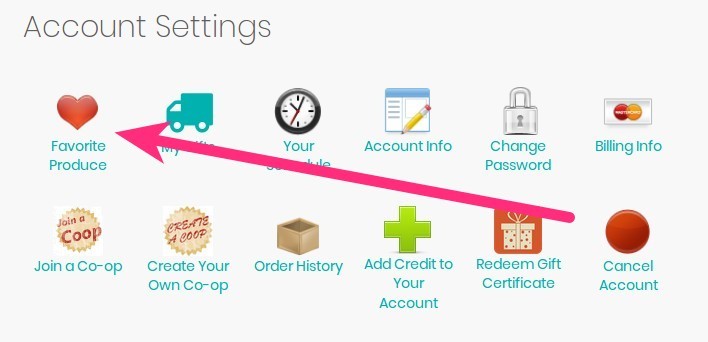
For customers, they can access the Love/Hate page through their dropdown menu or through their account settings overview page.
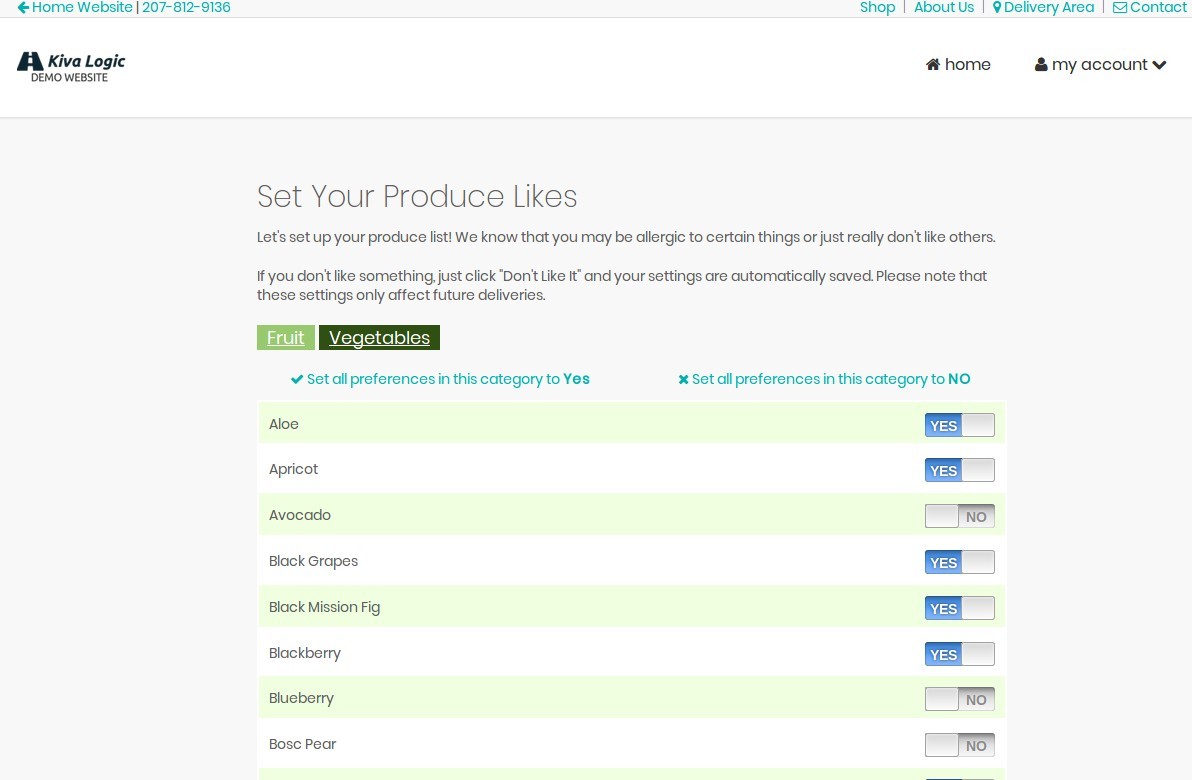
Once on the Produce Likes page, they will be shown a list of the Parent Classifications you set above, and all the master classifications that belong in those parent classifications. If they do not like an item, they just have to click or press the slider switch next to the item. There are also links they can click to set all the preferences in the classification to 'yes' or all of them to 'no'.
How Preferences Work
When the software encounters a product on a customer's "no" list, it will look at all the other available subs you have on the menu for that week. It will see what you have in stock, and what the wholesale cost of each item is.
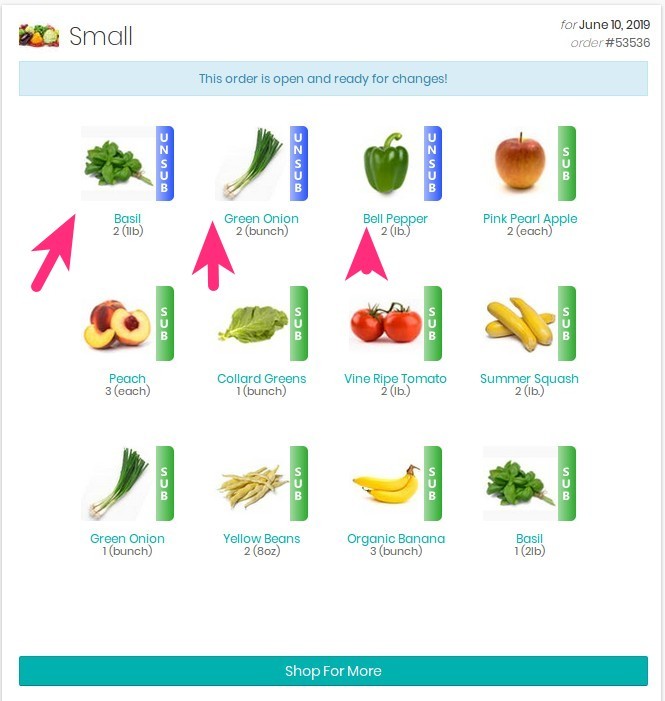
When a customer logs in, they will be able to see that subs have already been made for them. They can also 'un-sub' those products and pick out their own choices. The reason that we try to make automatic subs is so that if a customer doesn't log in, we can still try to give them a suitable replacement that week for a product they don't like.
Preferences Settings
Upper and Lower Sub Variances
When the system looks for suitable subs, it is allowed some wiggle room above and below the cost of the item being subbed out. To set the upper and lower sub variance, go to Settings, then scroll down to the "Software Misc." section, and you'll see "Sub Upper Variance" and "Lower Sub Variance".
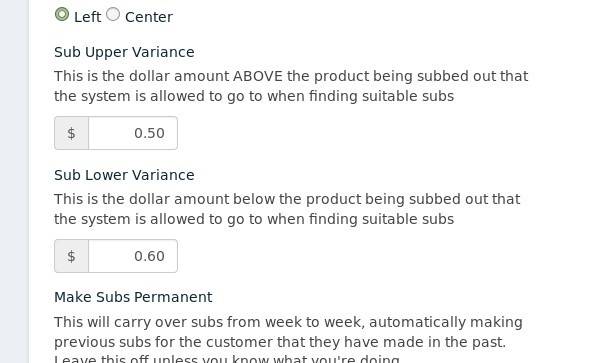
Sub Upper Variance This is the dollar amount ABOVE the product being subbed out that the system is allowed to go to when finding suitable subs
Sub Lower Variance This is the dollar amount below the product being subbed out that the system is allowed to go to when finding suitable subs
These sub variances ALSO apply to when customers make substitutions for themselves.
Allow the System to Sub in Permanent Products

By default, the system is only allowed to automatically sub in products that are 'this week only', and not permanent. If you would like to allow the system to sub in permanent items (as long as they meet all the normal requirements: in stock, sub enabled, value matches within variance), just set this selection to Yes (2)
Show the "Story Of Your Menu" Link
This setting can be enabled or disabled by going to Products, then clicking on the wrench at the top right of the page and clicking 'settings' (1 in the image just above this section), then scroll down until you see it (3 in the image above).
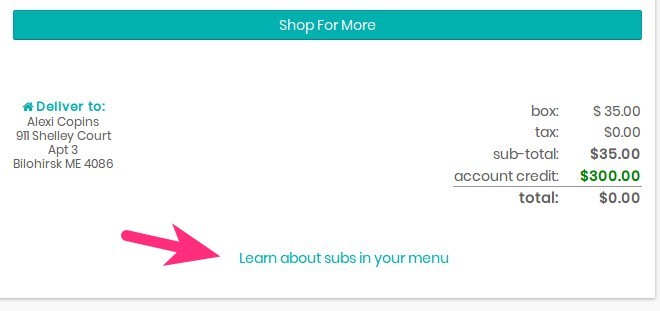
This will display a link on the customer's home page that they can click to view information about the products in their order. It will tell them what subs they have made, what subs the system made, or if something is just a standard menu item.
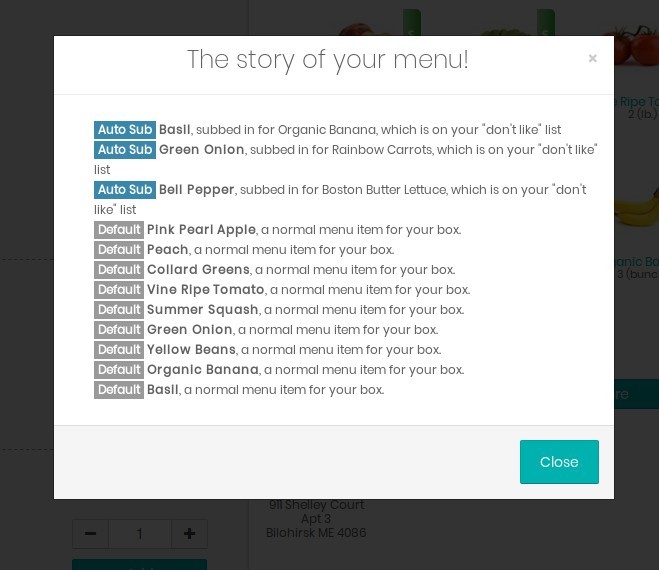
Viewing Subs as an Admin
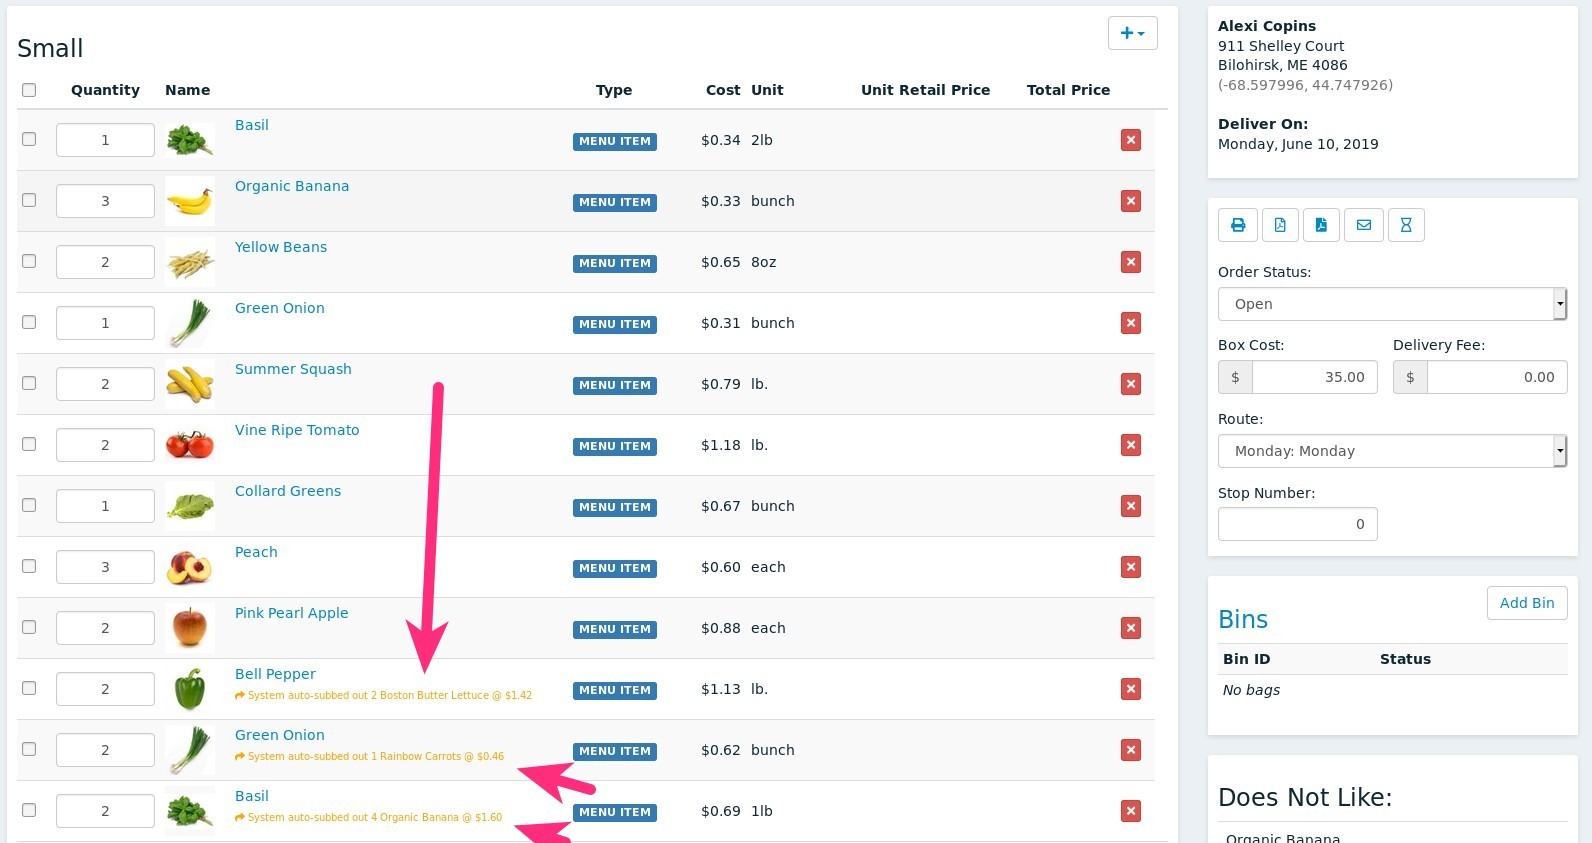
To view the system or customer subs made on an order as an admin user, just browse to the customer's account, then click on the wrench next to any order to view the order details page.
