Monthly Special to Promote Customer Sign Ups
PLEASE NOTE This feature takes some custom work to get set up and can not be used straight out of the box. If you are interested in this feature for your company, shoot us an email at hello@kivalogic.com. Once it has been set up for your company, you can use it as much or as little as you like without right through you admin interface :)
Using the Monthly Special feature, you can create new front hero sections for your main page that will turn on and off at pre-determined days. The hero section can contain an image and/or title, and if you have Active Campaign, it will show a form that captures the potential customer's email address and send it to Active Campaign with a Tag that you have selected.
The monthly special feature (if you have Active Campaign) will also determine what popup modal is displayed to your potential customers as well.
Getting ready to create a new special
Before creating a new monthly special, several elements are required to be set up:
a discount code that you want to promote
a background image for the hero. We recommend using an image that is 1900px wide by 500px tall for best results, but you can get away with using a small image (like 1200px wide)
- either an image to display or a title and sub-title text
Additionally, if you have our Active Campaign integration enabled:
an Active Campaign modal popup and form (if you have our Active Campaign integration enabled)
- a new tag created on Active Campaign that will be used to tag any customers that fill out the form on the front side.
Creating a new special

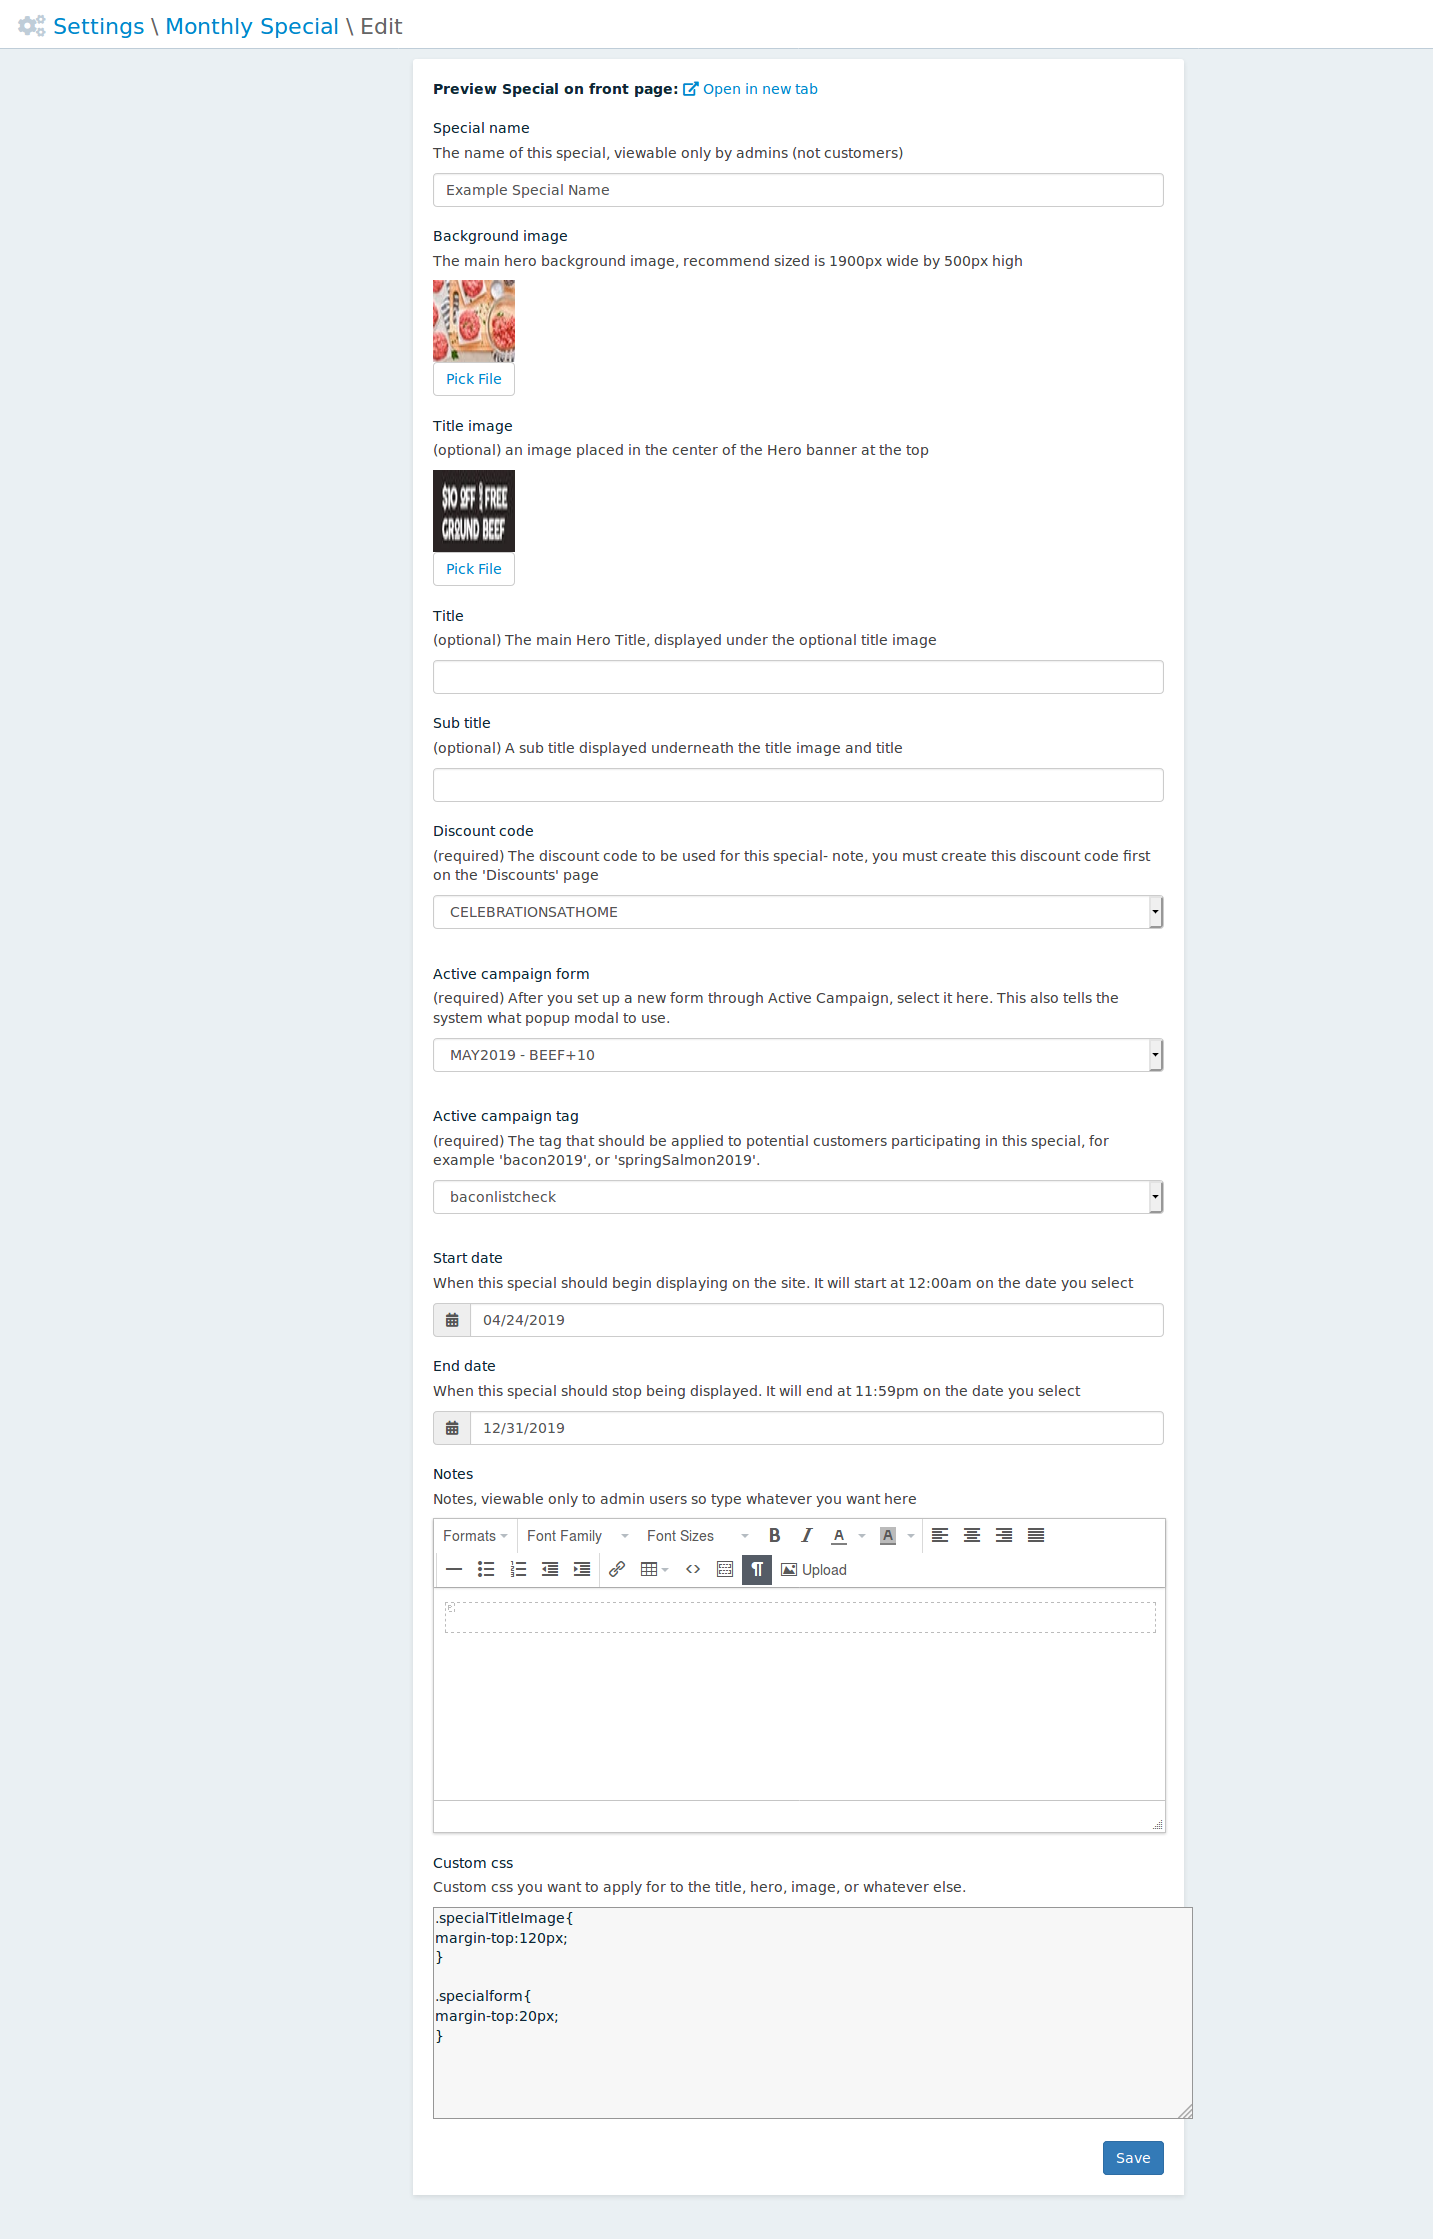
On the admin side, use the quick search feature and type "Monthly Special", or go to Settings->Content->Monthly Special, then click the button at the top right that says 'Add New Monthly Special'.

Elements of the special
Special name: The name of this special, viewable only by admins (not customers)
Background image: The main hero background image, recommend sized is 1900px wide by 500px high
Title image: (optional) an image placed in the center of the Hero banner at the top
Title: (optional) The main Hero Title, displayed under the optional title image
Sub title: (optional) A sub title displayed underneath the title image and title
Discount code: (required) The discount code to be used for this special- note, you must create this discount code first on the 'Discounts' page
Active campaign form: (required) After you set up a new form through Active Campaign, select it here. This also tells the system what popup modal to use.
Active campaign tag: (required) The tag that should be applied to potential customers participating in this special, for example 'bacon2019', or 'springSalmon2019'.
Start date: When this special should begin displaying on the site. It will start at 12:00am on the date you select
End date: When this special should stop being displayed. It will end at 11:59pm on the date you select
Notes:: Notes, viewable only to admin users so type whatever you want here
- Custom css:: Custom css you want to apply for to the title, hero, image, or whatever else.
Preview the special

Once you have created a new special, a link will show up at the top that you can click to 'preview' the special without it being live. This way, you can make changes, edits, and see what they will look like. This link will open a new tab of your front page and will display the special that you are editing.
When previewing a special, you'll also see a blue bar at the top that says 'Monthly Special Preview' :)
Front Page Example
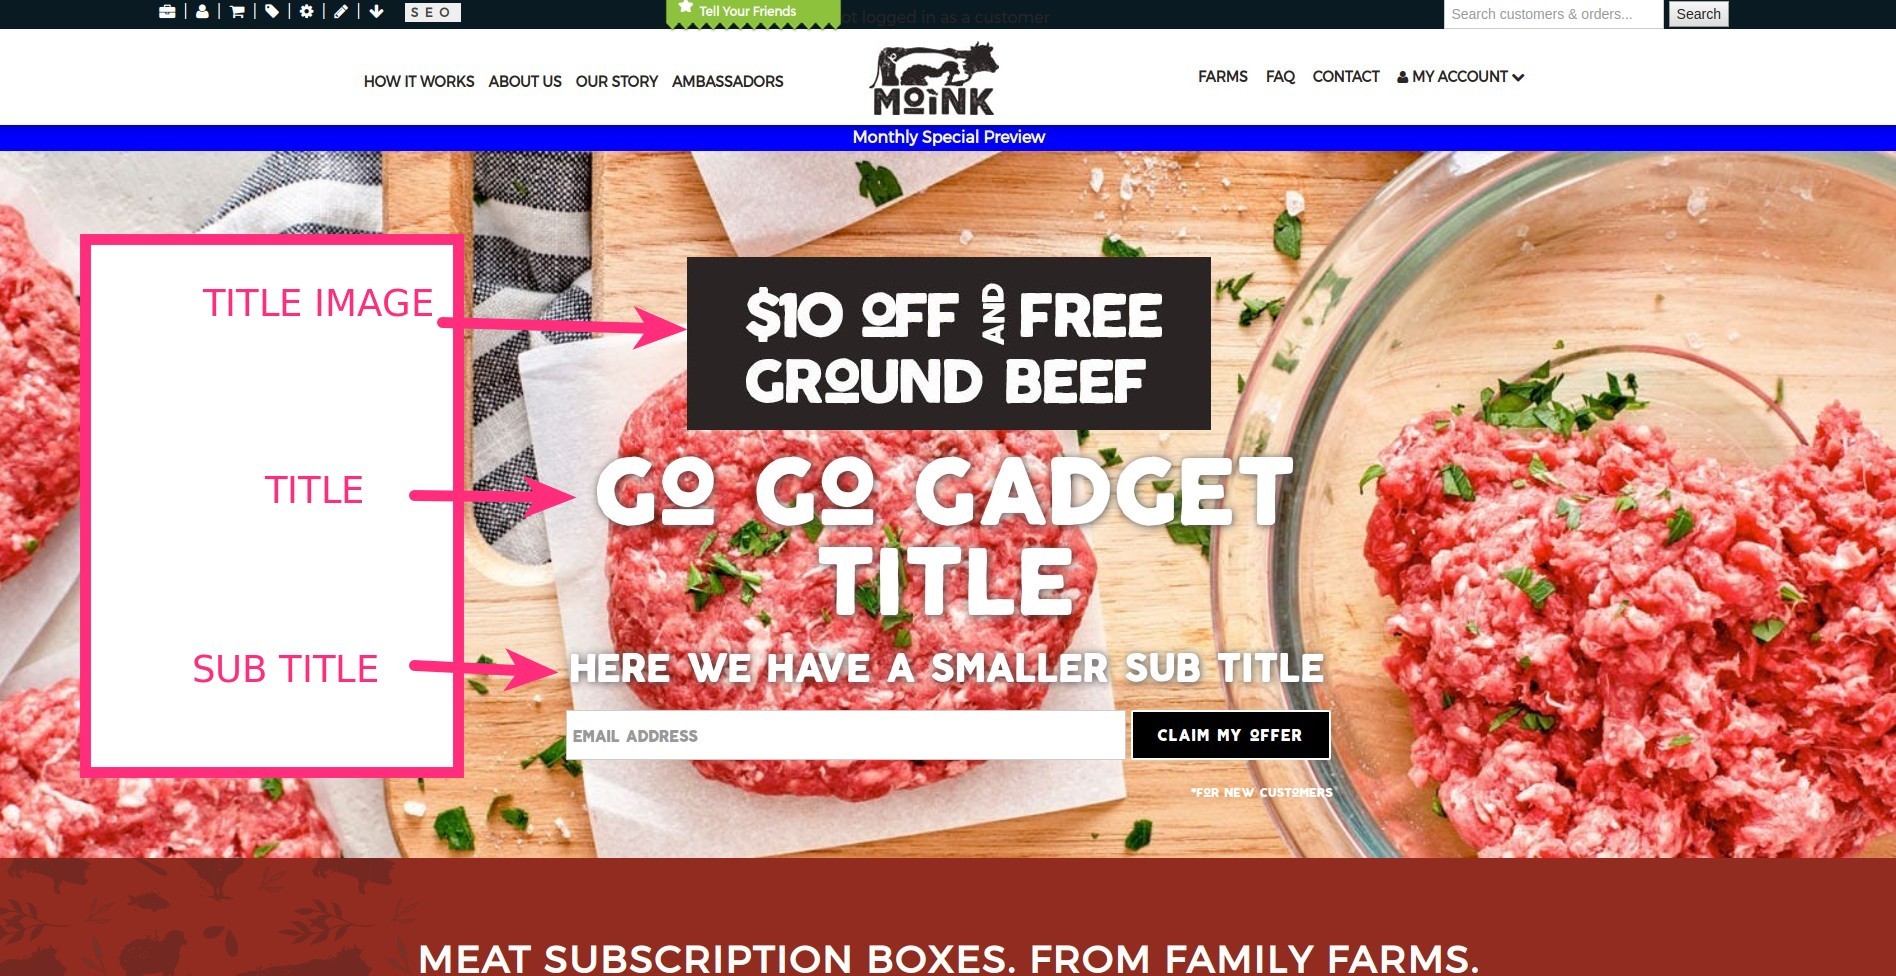
Using our friends over at Moink, let's take a look at the elements on the front page. In this example, we are using a hero background, a hero image, a title, and a sub-title so you can see where they are all laid out. If an element is not set, then it will simply be not displayed.

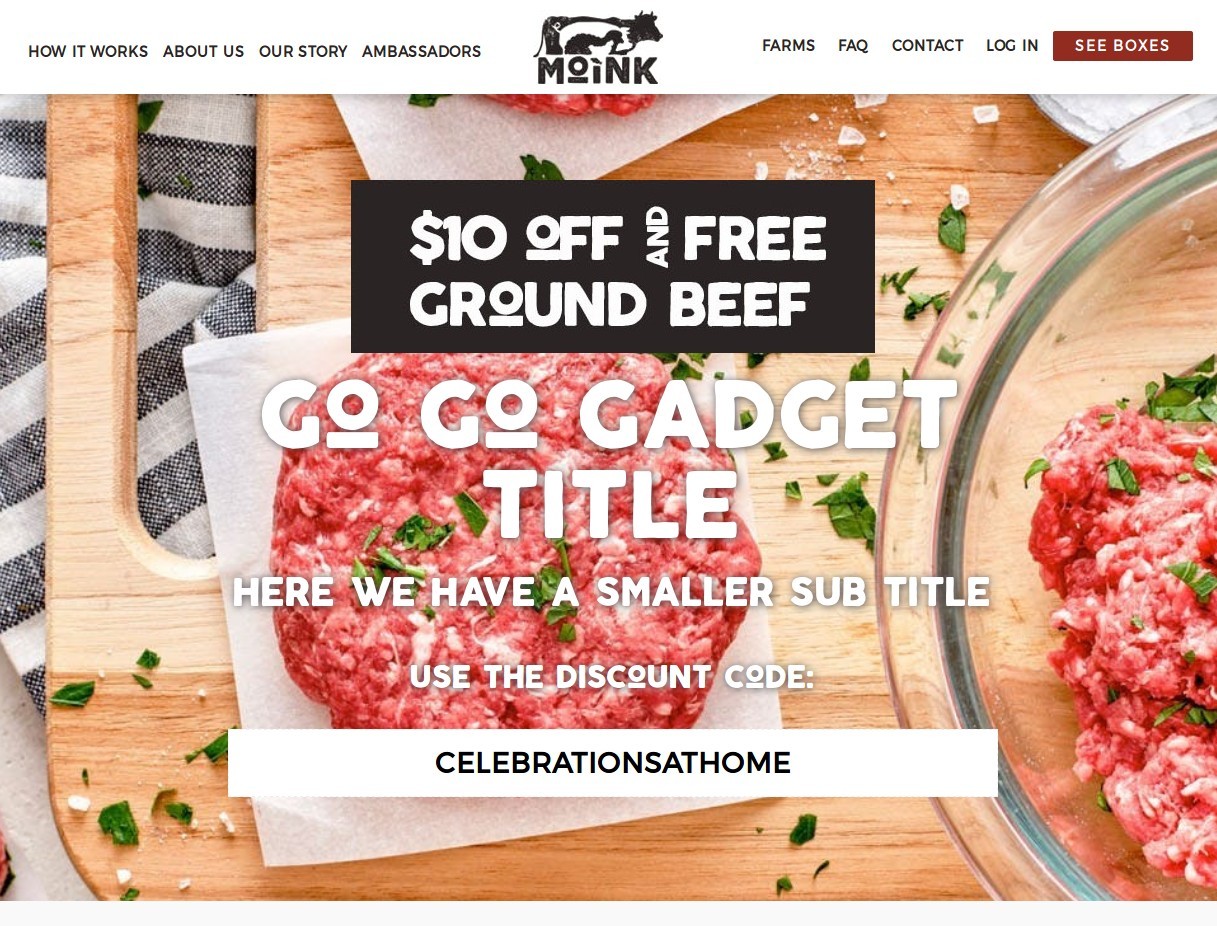
Box Prices Example
This is only available in very special cases and won't work for all customers!!
On this page, the discount code that you have selected will be displayed instead of the form.

Form Submission Details
IF you have the active campaign integration: When a potential customer submits their email address on the front page, here's what happens:
a log entry is made with the potential customer's email address and is tagged with the Active Campaign tag you selected for the special
- when the Active Campaign log parser runs, it will detect this log entry, parse out the tag ID # from the log entry, contact Active Campaign, create a new contact, and tag the new contact on Active Campaign with whatever tag you have selected for the special.
If no special is Active
If you do not have a special active, then your default front page will be displayed (the default hero background, title, etc that is normally displayed on the front page of your website.)
