Routific Integration on Kiva Logic
Click here for a larger screencast
Routific is the easiest and fastest way for you to optimize your delivery routes. With one click of a button, you can send a route to Routific, have them optimize it, and return the results to the Kiva Logic software. All with one click! It doesn't get any better than that.

Routific is a route optimization platform that can greatly reduce your delivery costs by finding the best way to deliver your orders. Routific is not included with Kiva Logic, so you will need to sign up for your own account.
Setup
After you've created your Routific account, you'll need to grab your Routific API Key.
log in to your Routific.com account
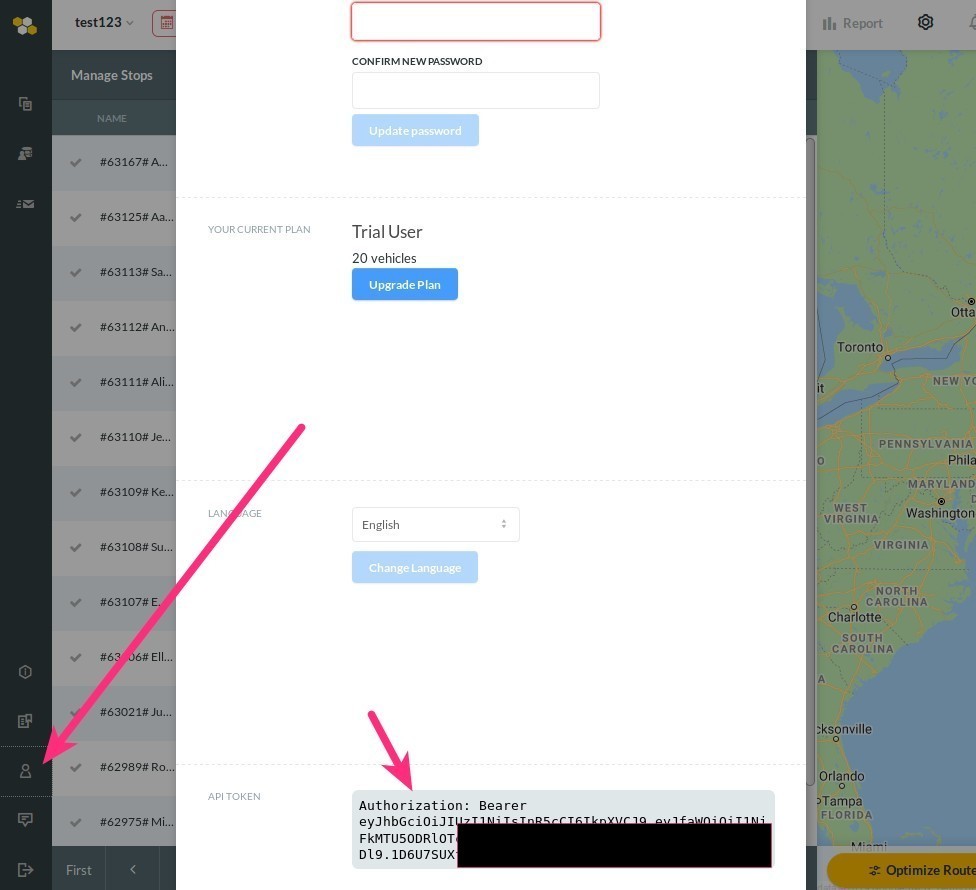
click on the 'my account' button at the lower right (screenshot attached, big arrow)
in the modal pop-up, scroll down to the bottom and you'll see a section 'API TOKEN'.
- Copy the whole string of text that starts with 'Authorization: Bearer...', this is your API key
Now we need to paste your Routific API Key into the Kiva Logic admin. Go to the Delivery->Settings page and scroll down to the section called "Routing Method".
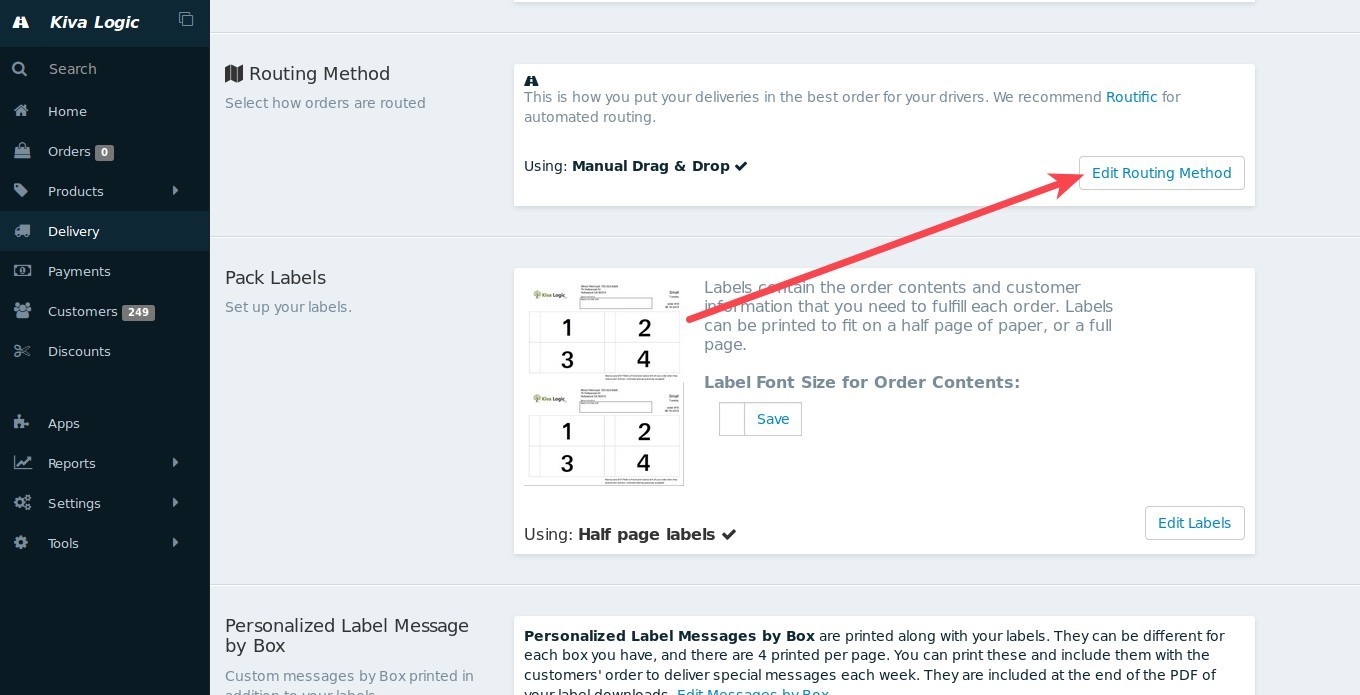
Click on the "Edit Routing Method" button, then select "Routific Integration", and then paste your Routific API key in. Your Routific API key starts with the text "Authorization: Bearer...".
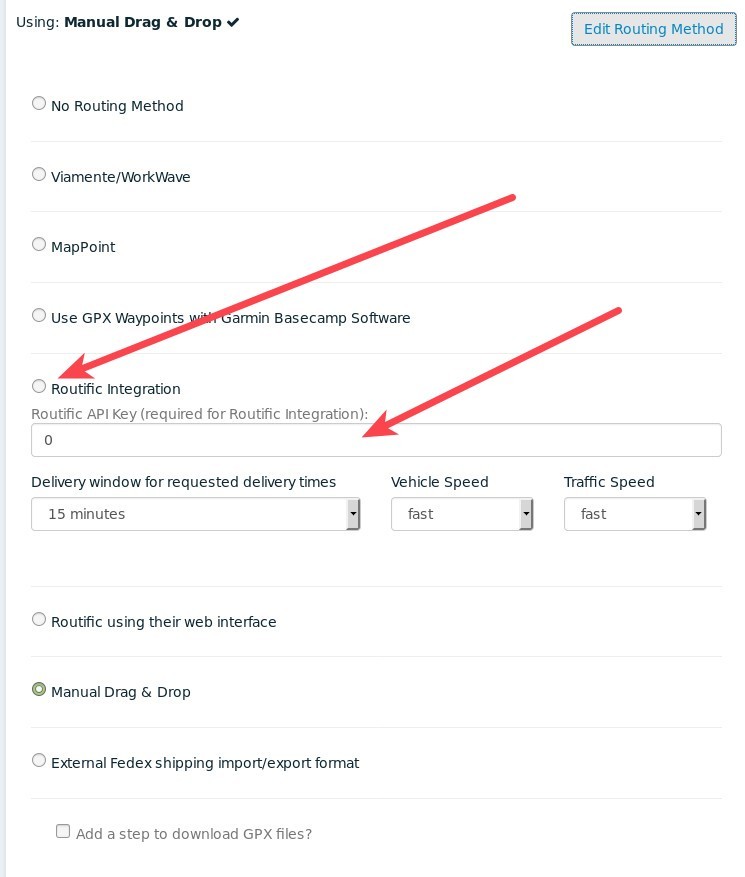
Now click "Save Routing Method". Done and you are ready to route!
Usage
Usually you will want to get your routing done the day before deliveries so you can print labels and driver sheets. Make sure that you wait until all orders for the day have been locked in and 'closed' before you do routing! If you do routing before orders close, it will not be accurate.
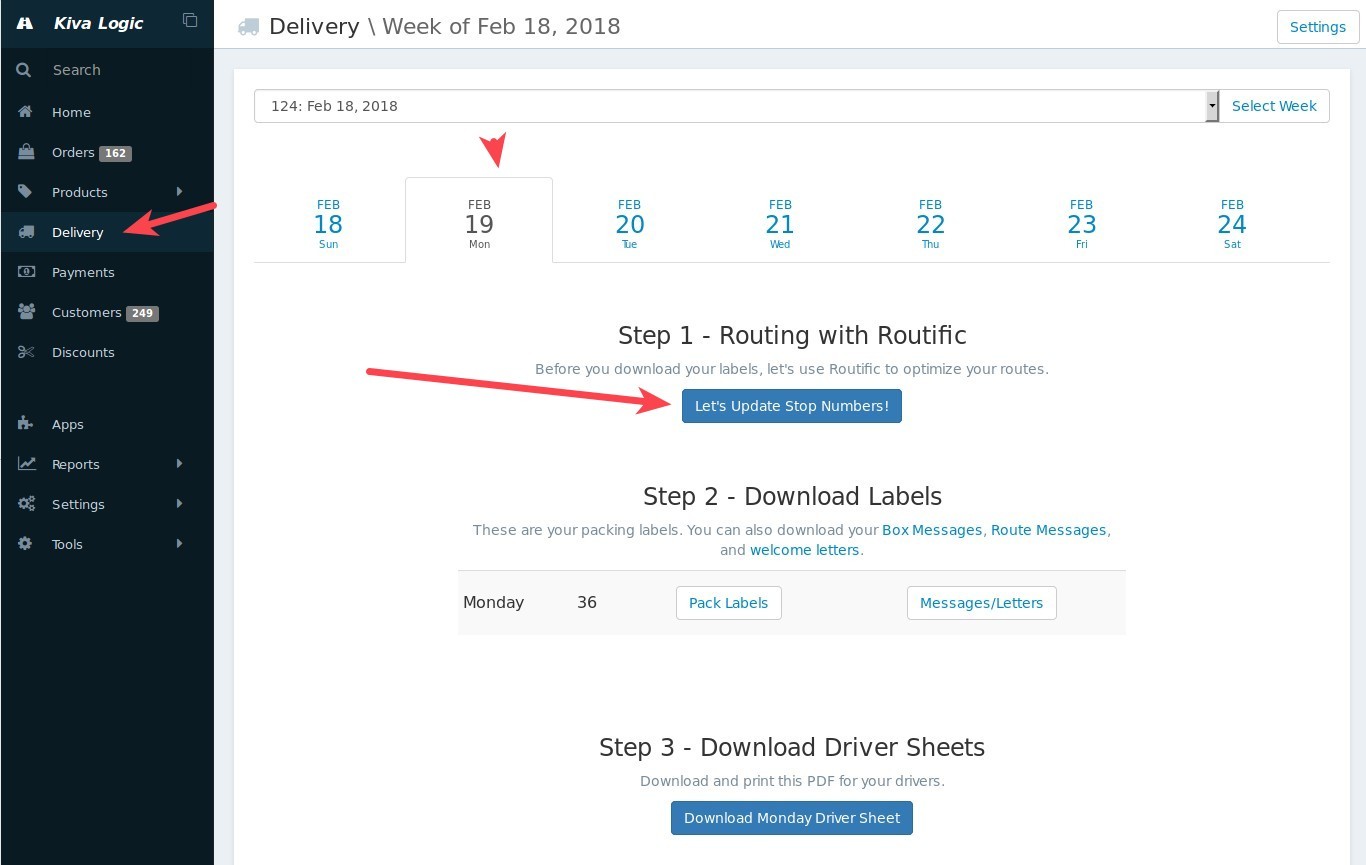
First, navigate to the "Delivery" page and select the day you want to do routing for. You'll see that the first step in the Routing and label process is now "Step 1 - Routing with Routific". Go ahead and click the button "Let's Update Stop Numbers!" with enthusiasm!
You will now see an overview of all stops for that day.
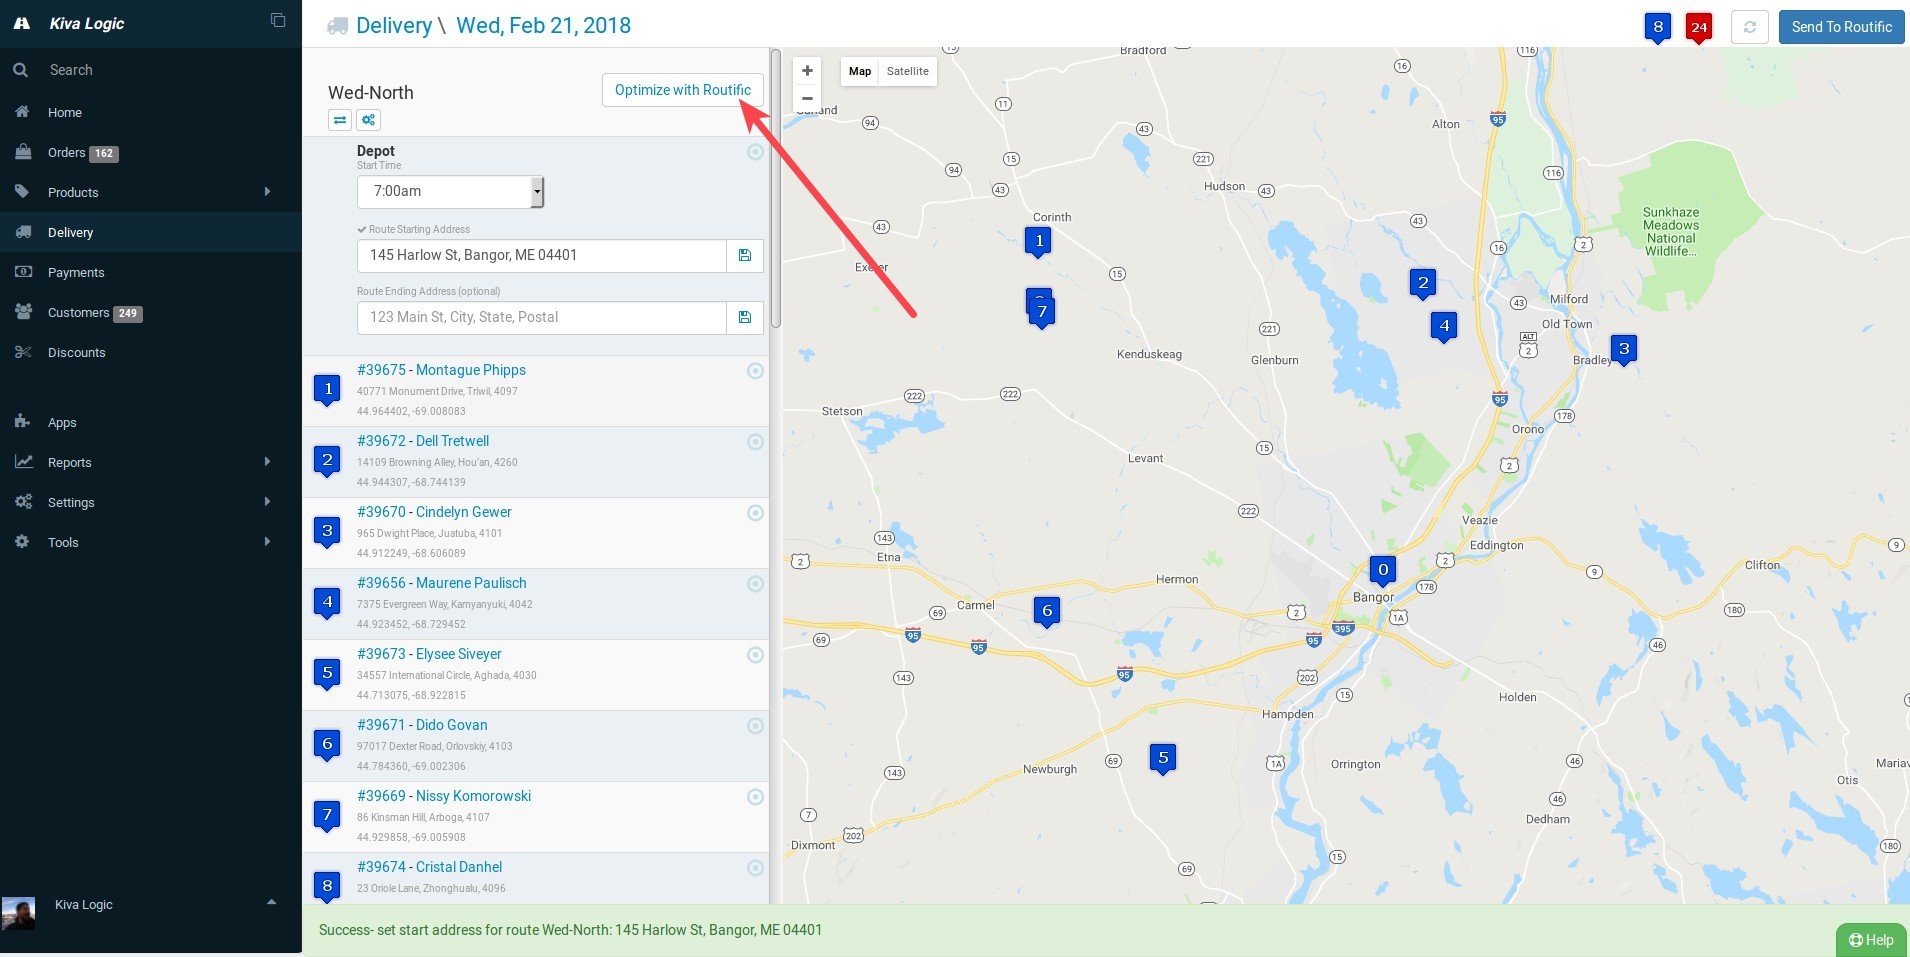
Next, find the route that you want to optimize and click the button 'Optimize with Routific' (arrow pointing to it in the picture above). You will see a popup with a message letting you know of the routing progress. This can take anywhere from 5-30 seconds (or more) depending on how many stops your route has.
See the gif at the top of the page to see what it looks like!
...and you're done! It's really that simple. Now you can go back to the delivery page and proceed to download your labels on step 2, and download your driver sheet(s) on step 3.
Options
You might have noticed there were a few other options you could adjust on the Delivery Settings page under the Routific integration. You can tweak these settings until they fit your local traffic patterns.
Delivery window
If you have set a delivery time on a customer account, this option says how big of a window around that delivery time Routific is allowed to have. For example, if you set a delivery time for a customer to 12:30, and the delivery window setting is 15 minutes, then Routific will do their best to route your orders and have that customer's delivery estimated time of arrival be betweek 12:15 and 12:45.
Vehicle Speed
How fast your vehicle moves. If you have a slower driver, you might not want to set this to fast.
Traffic Speed
How fast or slow your local traffic is. This setting and the vehicle speed setting are used in the route optimization process, and they are also used by Routific to calculate the estimated time of arrival for each delivery.
Notes
There are a few other features on the Delivery page.
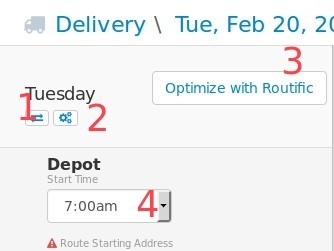
Reverse route: After you've optimised a route with Routific, this button will reverse the direction of the route, changing the first stop to the last, and the last stop to the first. Useful if you have a driver that likes going in a particular direction first.
Route Settings: Takes you the route editing page for details
Optimize with Routific: We covered this above. This is the button that sends your route to Routific. The one-click routing solution button!
Start time: This should be set to when your vehicle will start delivering. Routific uses this time to calculate the estimated time of arrival for each order.
- Not picture above, you can also set the starting and ending address for each route.