Product Management Home Delivery Software
The Products area is where you can control your permanent products, weekly products, boxes, menus, units, distributors, and vendors/farms. Using the Kiva Logic software makes it easy to handle product management.
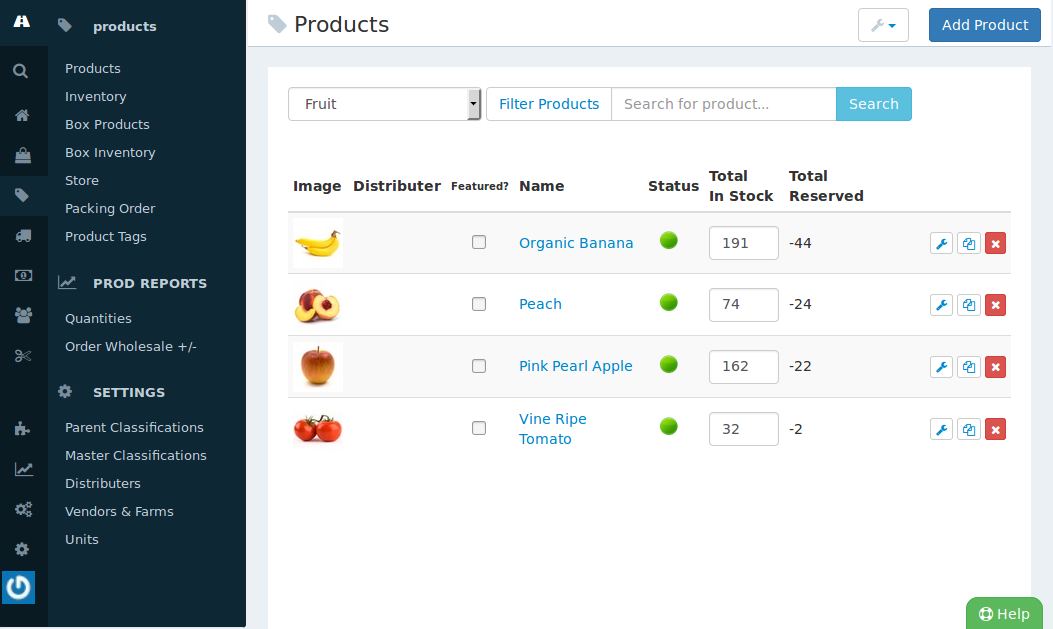
Products
When you add a product, you can choose whether this product should be a permanent product, or a 'weekly' product.
Permanent Products
These are products that you plan on carrying for multiple weeks. Some items that might fit here would be:
Breakfast Cereal
Canned dog food
Bread
- Milk
Items that you plan on having available for awhile, basically, recurring products. You can turn these products on or off week to week, and these products have in stock numbers and reserved numbers.
Permanent Products should be added through the main Products page by clicking the button at the top right that says "Add Product".
Weekly Products
Weekly products are items that you plan on carrying only for the weekly cycle that you are. They will only exist for this week, and then they will be cycled out of the system at the start of the next week.
You should use weekly products if you are, for example, a produce delivery company that has a different menu each week. You would want to start with a blank slate to build your menu, so you can add products for the current week based off of your pricesheets.
Miscellaneous Settings
The wrench icon brings up a 'misc settings' window. This window allows you to control whether a farmers or vendors page should be displayed on the front of your website, and whether the vendor/farm should be listed with the product for customers to see.
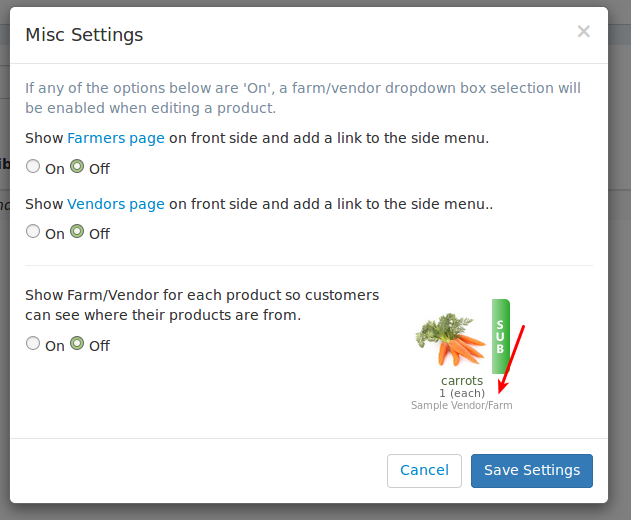
Farmers Page
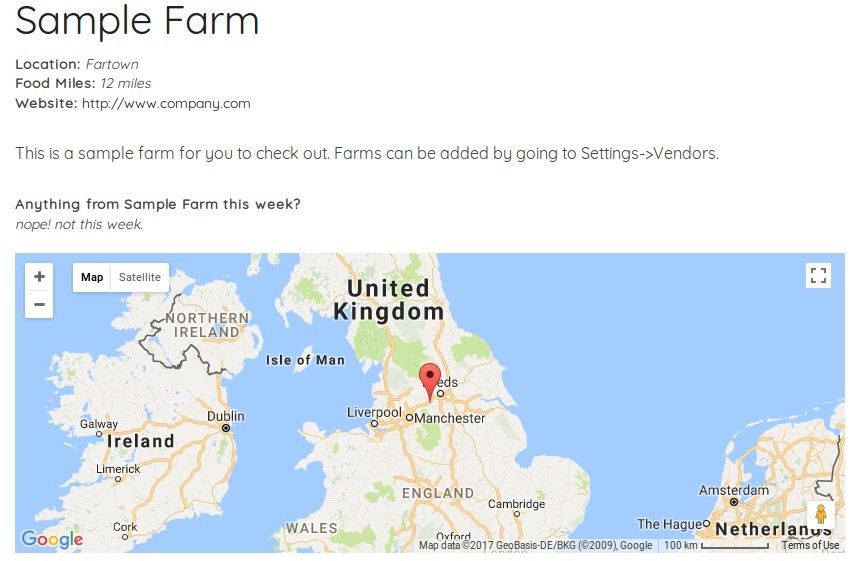
The Farmers page will display a list of each product that you have, and also will display a list of all of your farms. You can add or edit farms by going to settings->vendors on the admin side. When you enable the farmers page, a new link will be displayed in the front navigation menu to the farmers page.
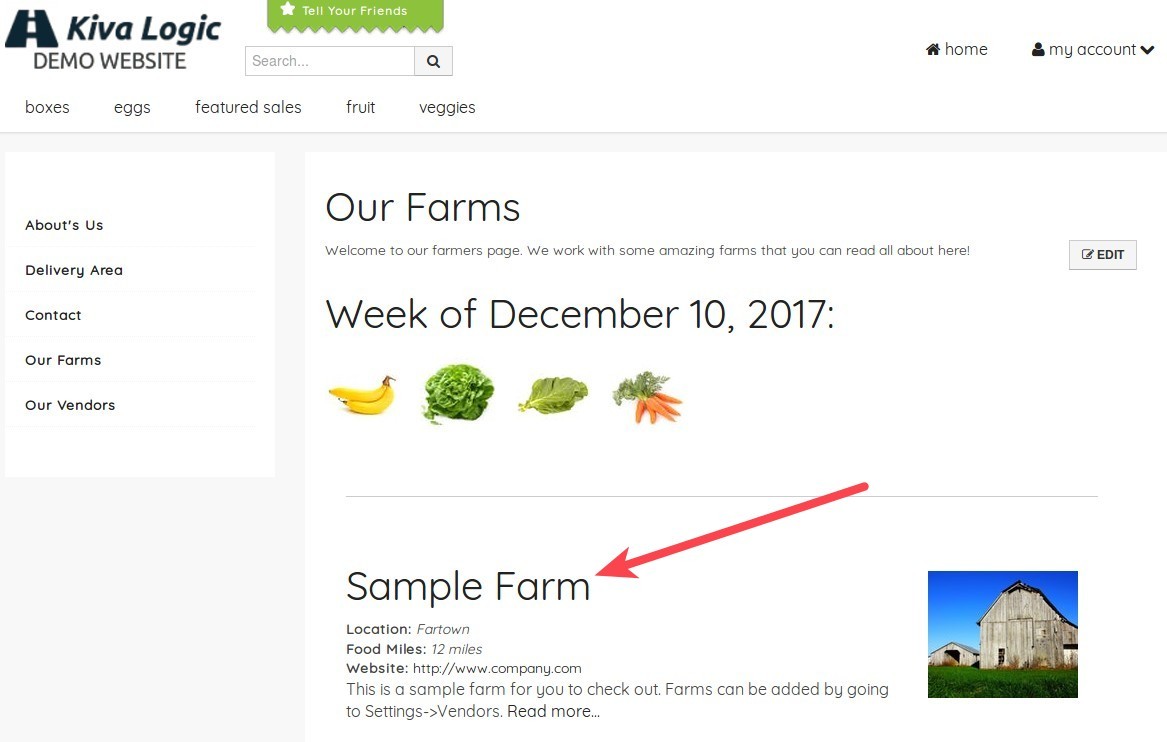
If you click on the name of the farm, it will open a 'details' page about the farm. This is handy because you can get more pages indexed with the names of the farm, which can sometimes help your SEO. Check out this link for an example: https://kivalogicdemo.kivalogic.com/farms/sample+farm it will look like this:
Vendors Page
The vendors page looks and behaves the exact same as the farmers page, only it's titled "Vendors". That's a more generic description so that you have a place to add vendors. You can add a vendor by going to settings->vendors.
Show Farm/Vendor
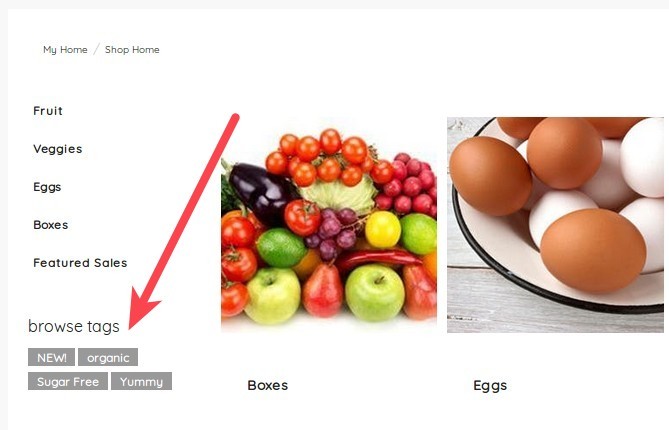
If enabled, this feature will print the name of the farm or vendor on the labels, and it will also display the information to customers when they are shopping or looking at their order. This is a sample of what the customer sees on their home page:
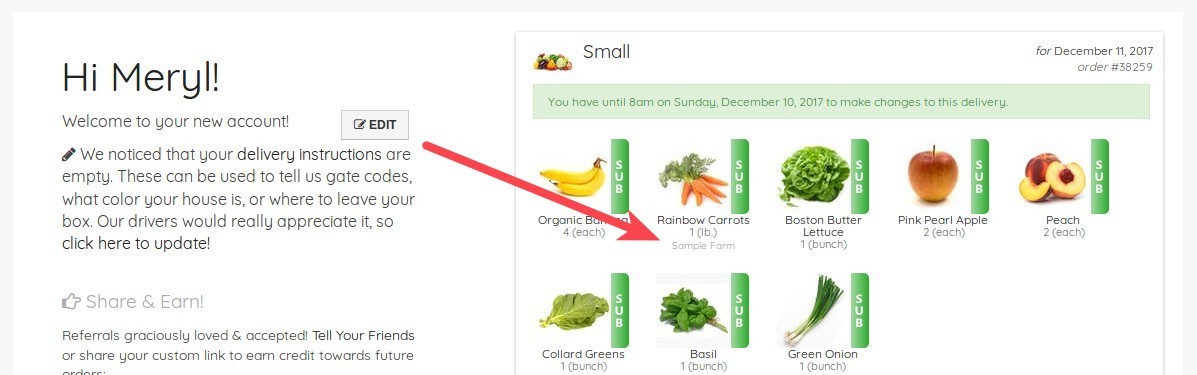
When shopping, if a customer is viewing the details of a product, IF a farm/vendor is linked to the product it will be displayed under the product name.

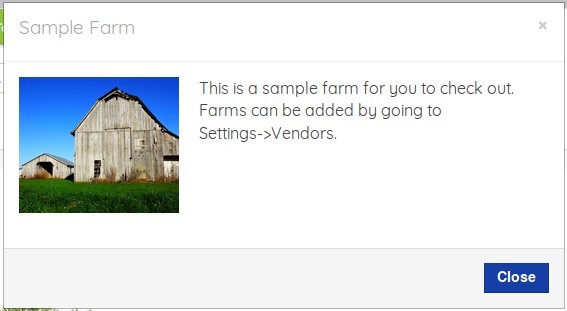
If the customer clicks on the name of the farm, a pop-up will show the customers more information about that farm.
Inventory
The inventory page can be used to view the demand you have for the current week, broken down by day and it also gives you the total needed of each product.
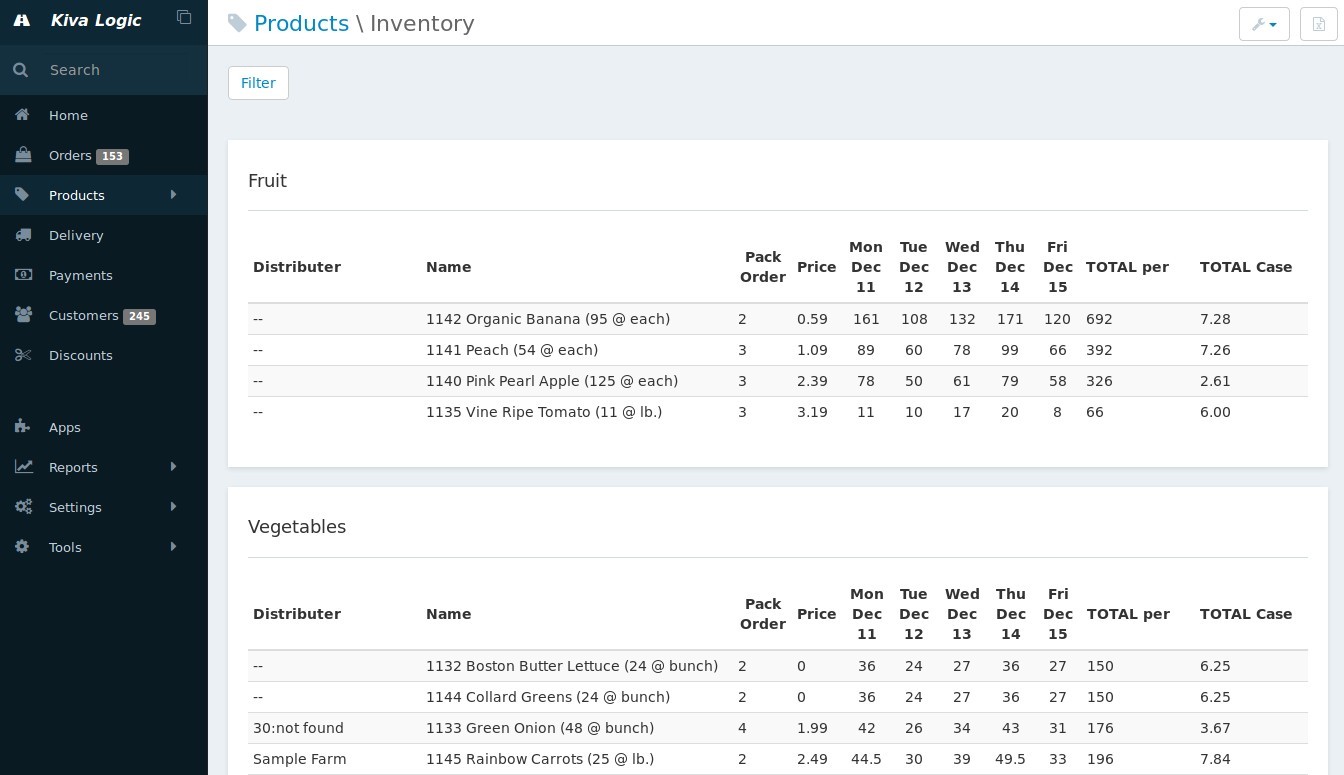
You can click on the CSV icon at the top right to download a spreadsheet containing the current inventory information. Here is a sample: All-Inventory-Demand-06-Dec-2017.csv
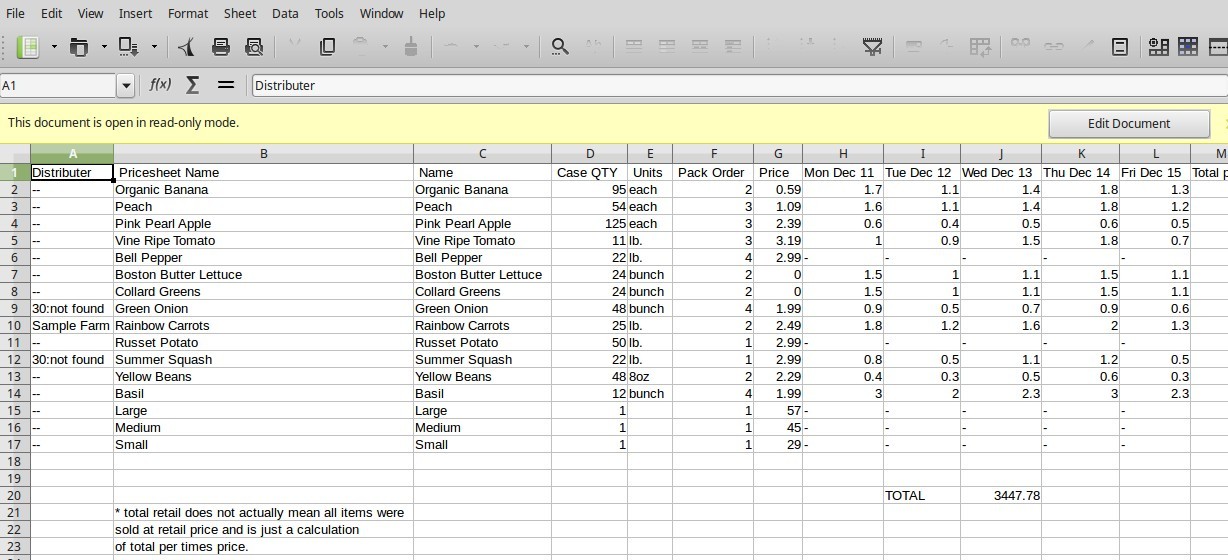
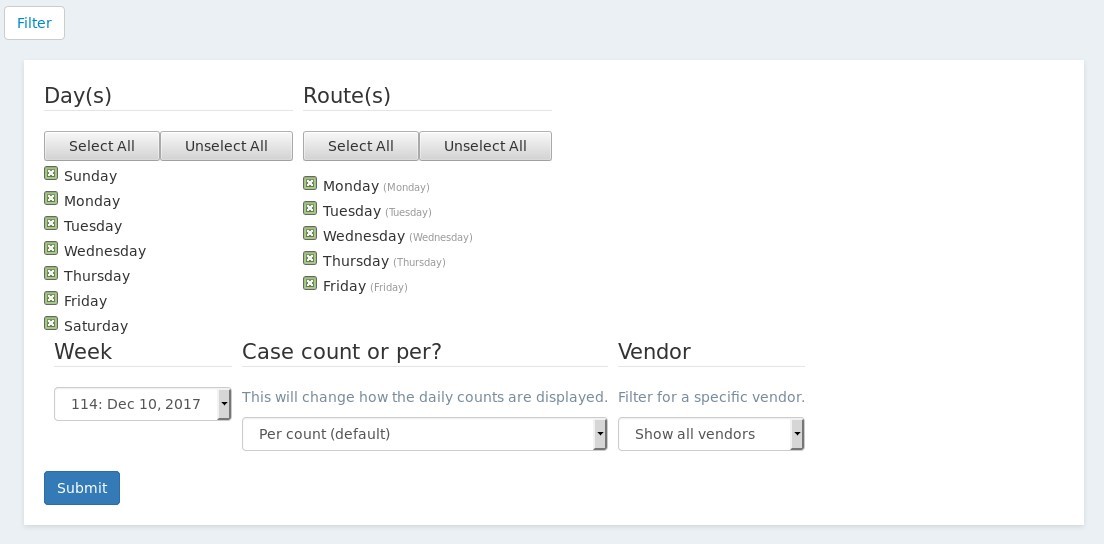
Filters
You can filter the Inventory by:
Day
Route
Week
Case count or per
- Vendor
Box Products
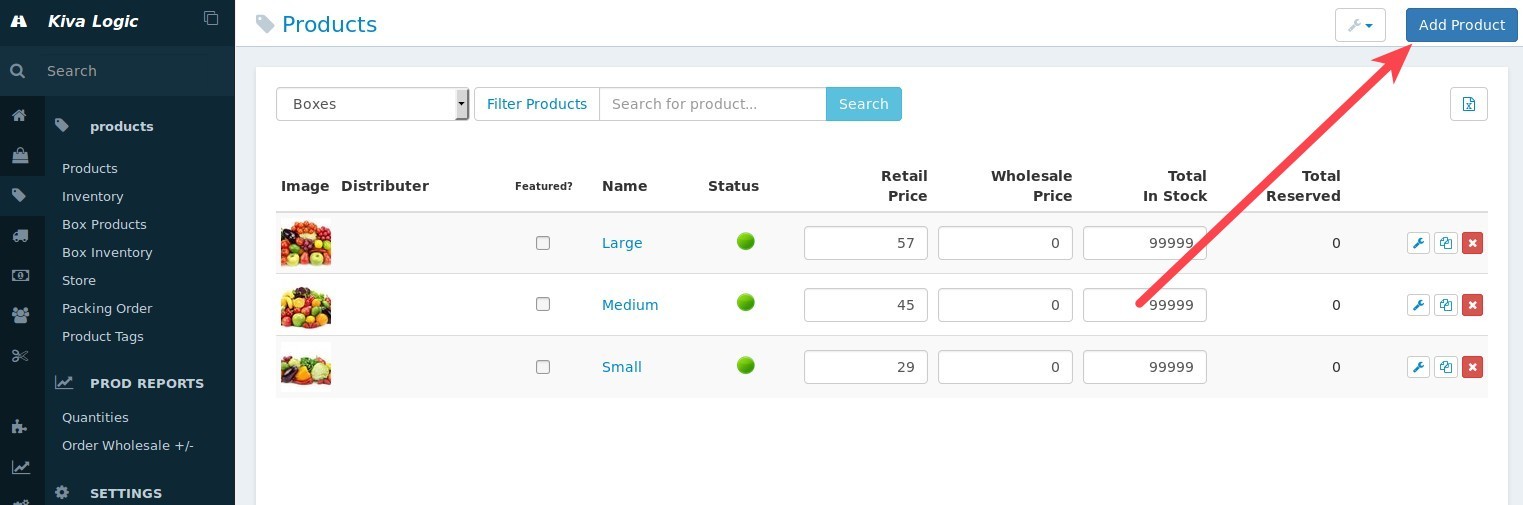
This is where you build your 'menu' for your 'boxes' each week! In this example, a produce company is offering three boxes: Small, Medium, and Large.
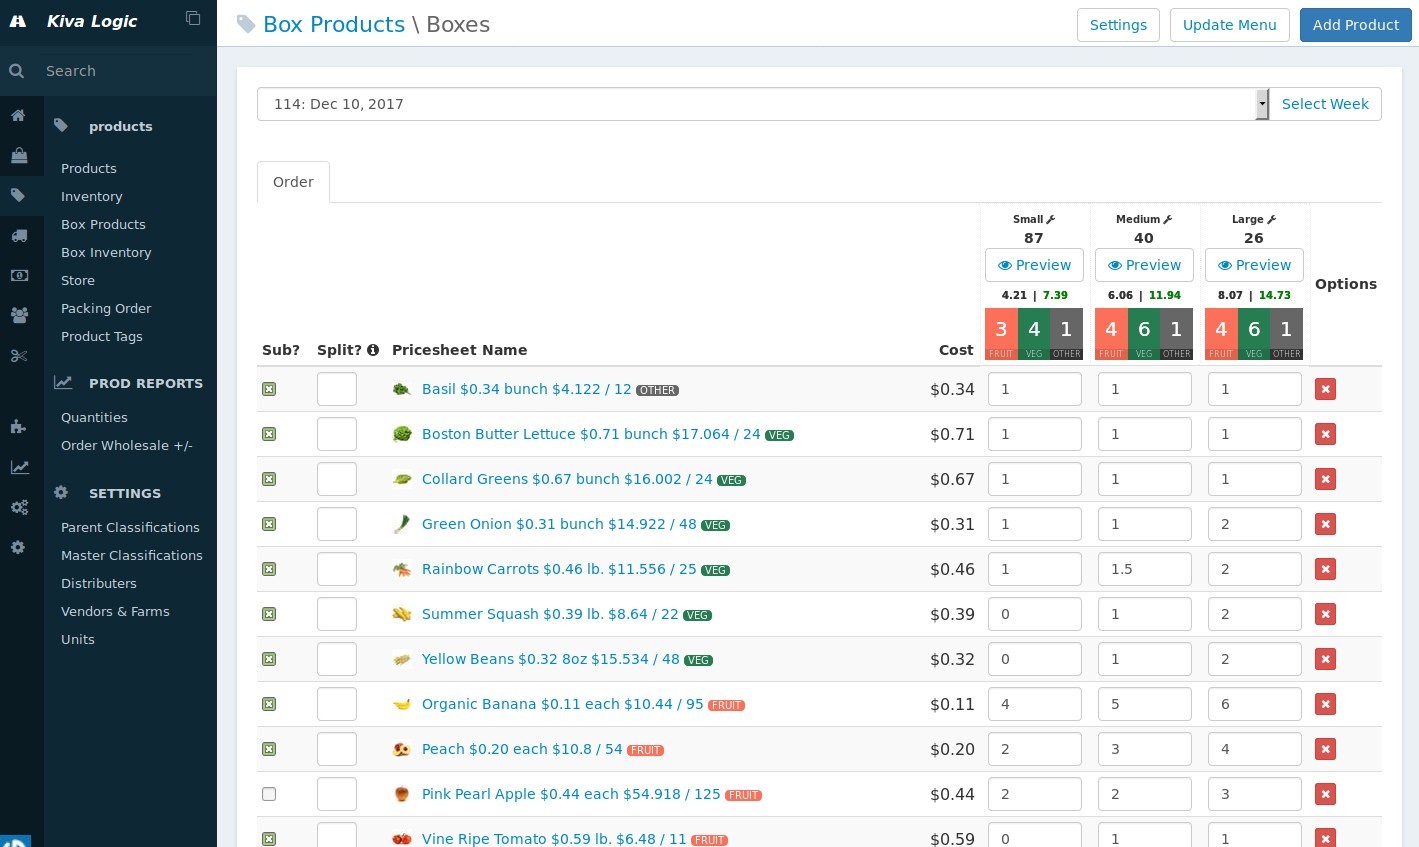
sub? Whether this product can be subbed in or not.
Pricesheet Name This is the name of the product that is ONLY VISIBLE to admin users. Customers do not see the 'pricesheet name'.
- Cost Your wholesale cost per unit
In the table is where you type how much of each item goes into each box. This information is all saved automatically, so feel free to play with the numbers! This is very useful for when you are trying to build your ideal box- you can try different quantities and the system will tell you what your wholesale cost is.
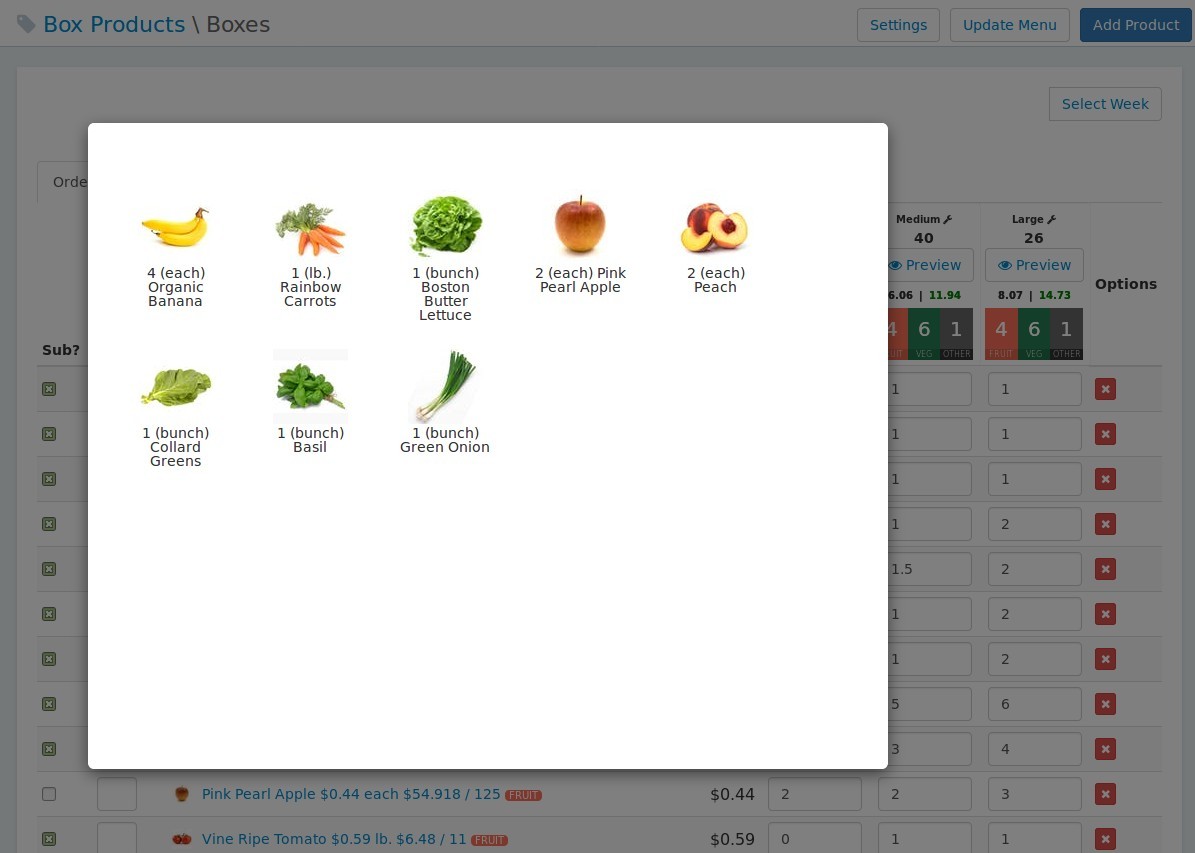
If you click on the 'Preview' button underneath each box, a pop-up will show you a visual represenation of what your box currently looks like. Very useful to see the menu how a customer will see the menu!
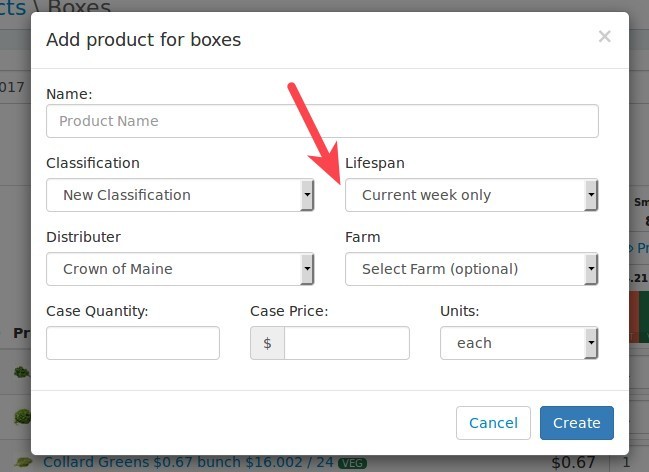
If you have a product that you want for this week only, click the button at the top right that says 'Add Product', then use this screen to add it and make sure the setting stays at 'Current Week Only'
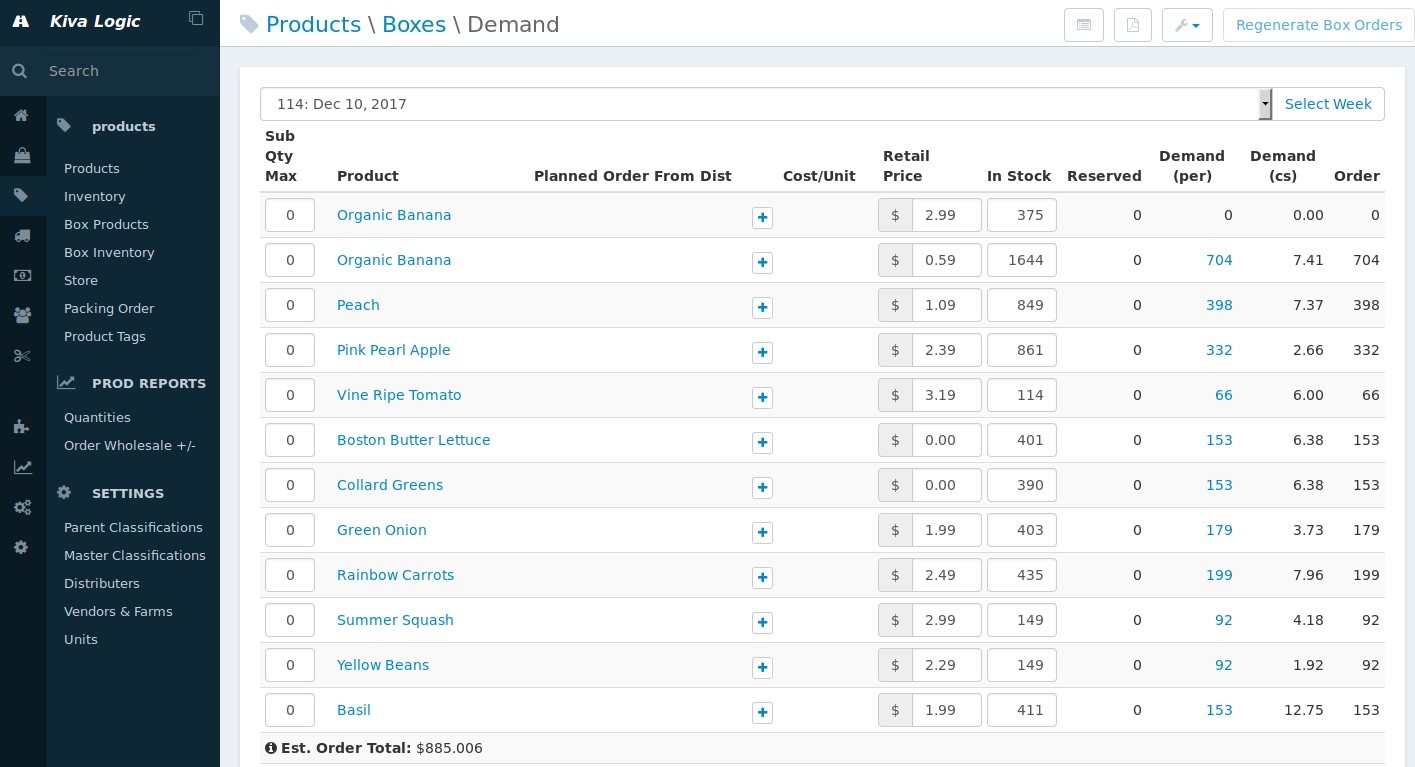
Box Inventory
The Box Inventory screen is where you can view the total demand for each 'this week only' product. You can also update the retail price and the in stock numbers.
Inventory Invoices
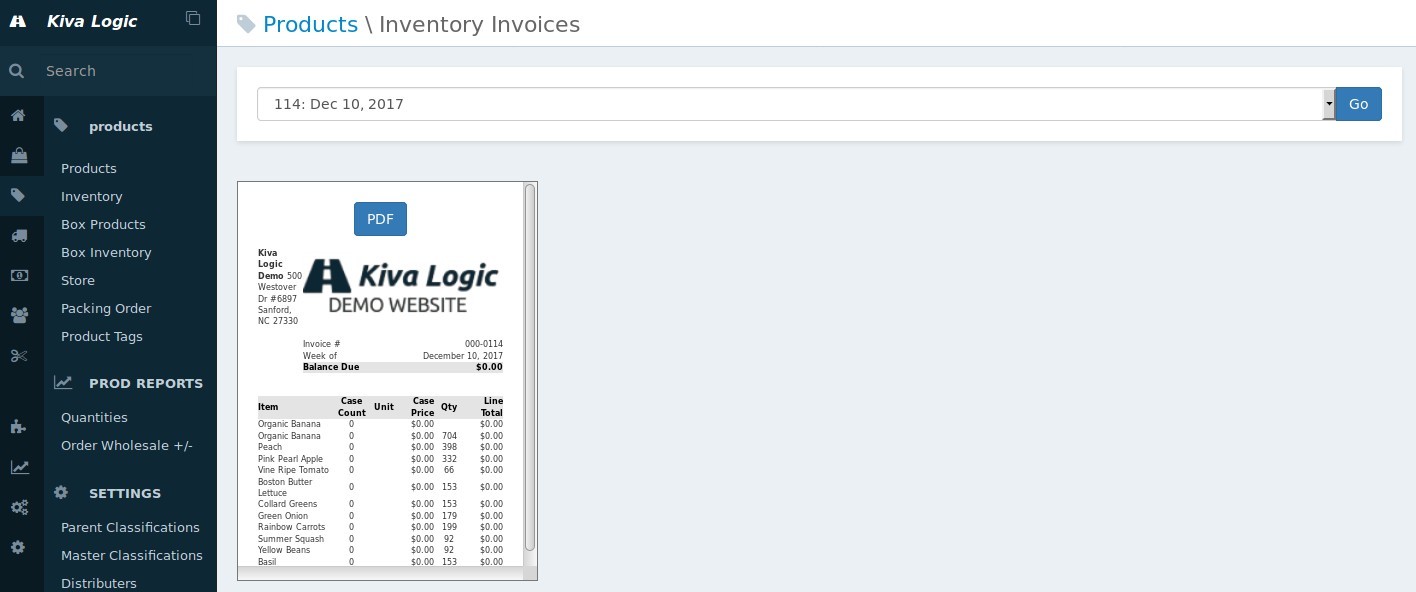
This will show you an invoice for each vendor/farm that you have in the system. You can download these invoices as PDFs. This feature is used by some companies for record-keeping purposes.
Auto-set In Stock
@documentation not complete :)
Auto Set Retail
@documentation not complete :)
Store
This is where you manage the categories that are displayed in your shop! Please note- store categories are NOT the same as product classifications.
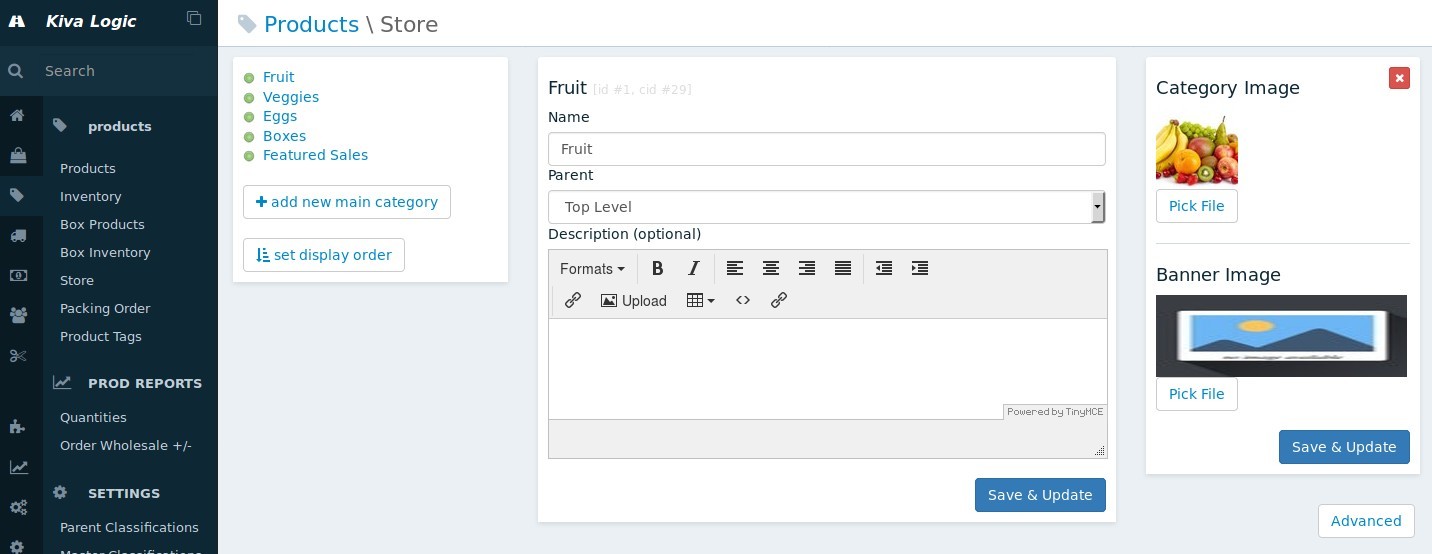
You can add, edit, set the display order, and everything else you need to do for your store. (your store is where people shop for add-ons!)
Packing Order
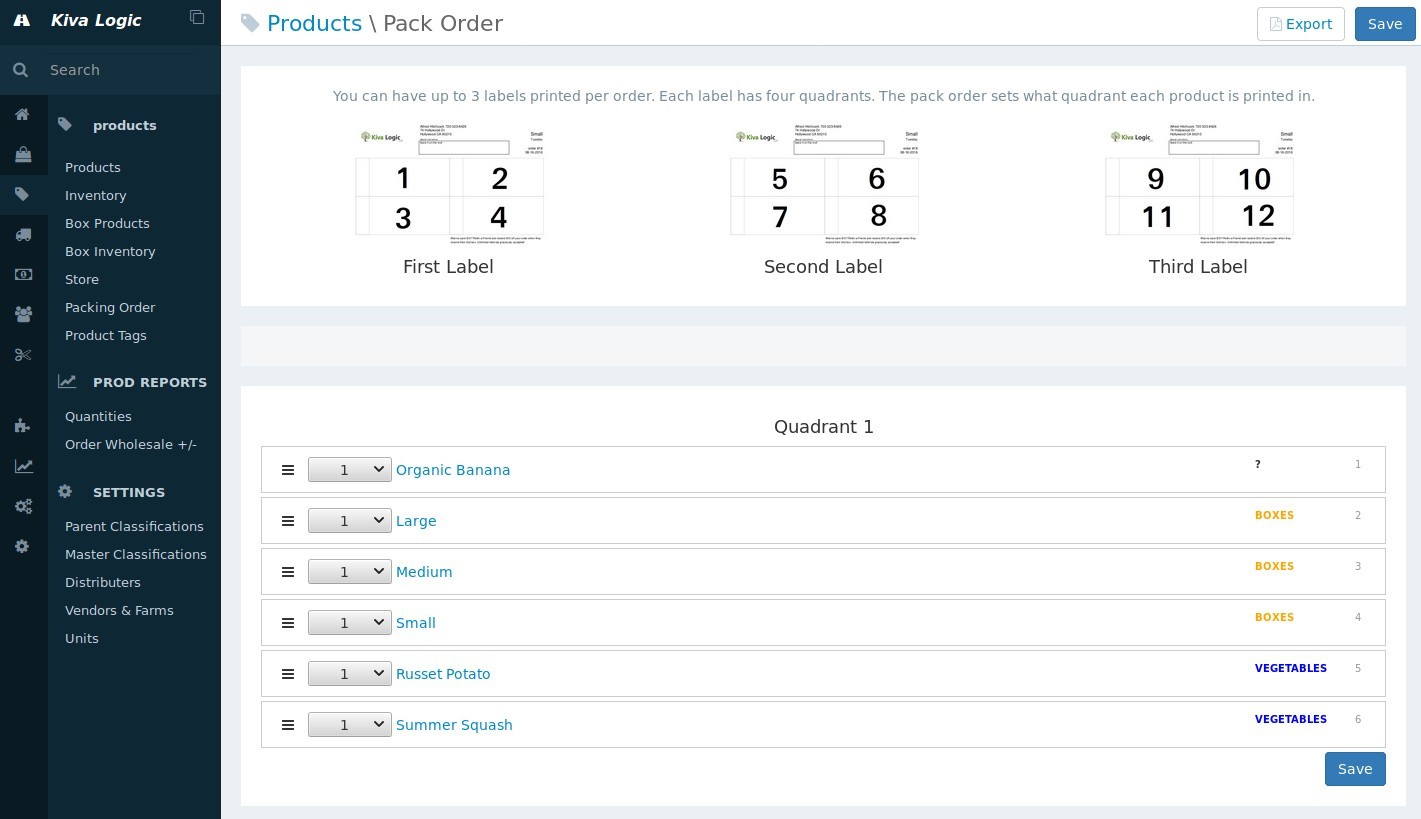
The Pack Order dictates how products are printed on your labels. Each label is broken up into four quadrants. Ideally, in your warehouse you will have one person responsible for each separate quadrant. This is very useful for pack lines!
The 'Sub-PackOrder' can be set by dragging and dropping individual products within a quadrant. This is for fine-tuning where you want products to be printed on the label.
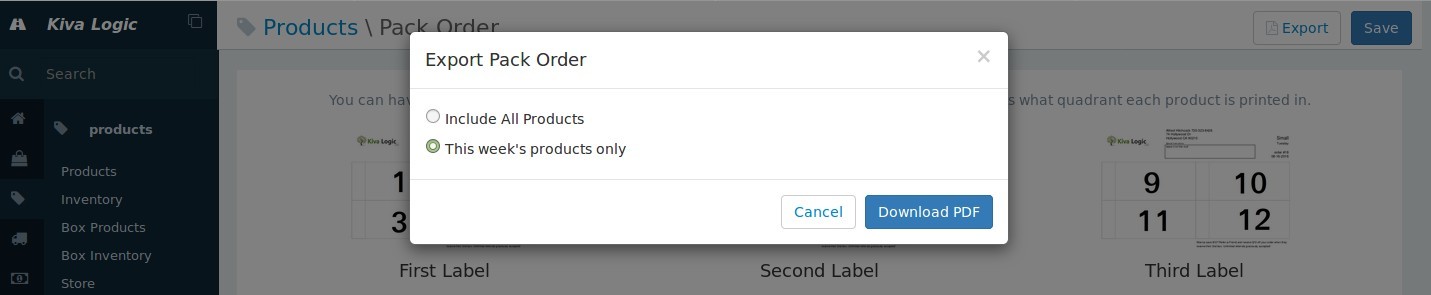
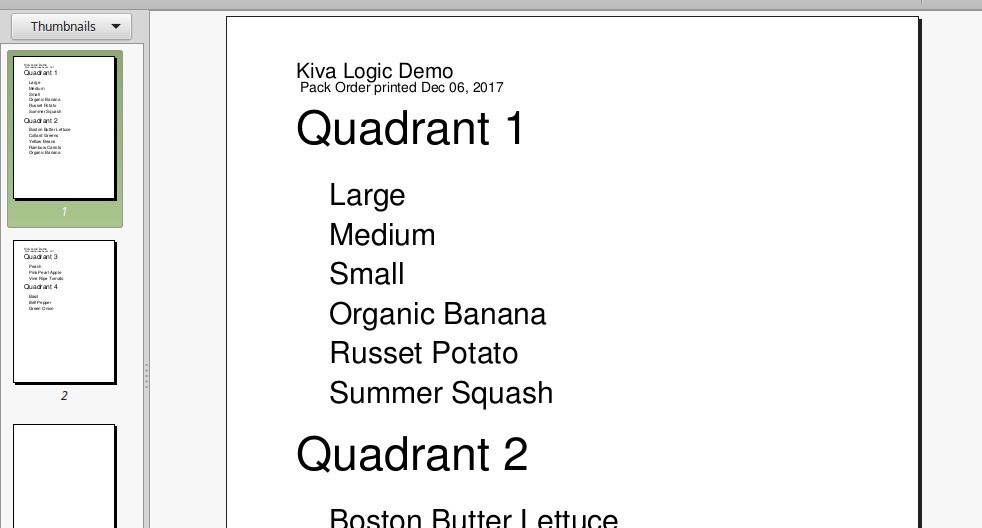
You can export the pack order to print out a hard-copy for the warehouse so they know how to set up the pack line for the day. You can download a sample pack order PDF
Product Tags
You can tag a product to place them in useful groupings. These tags are displayed to the customer in the shop, and customers can click on the tags to see all items that have been tagged with that keyword.
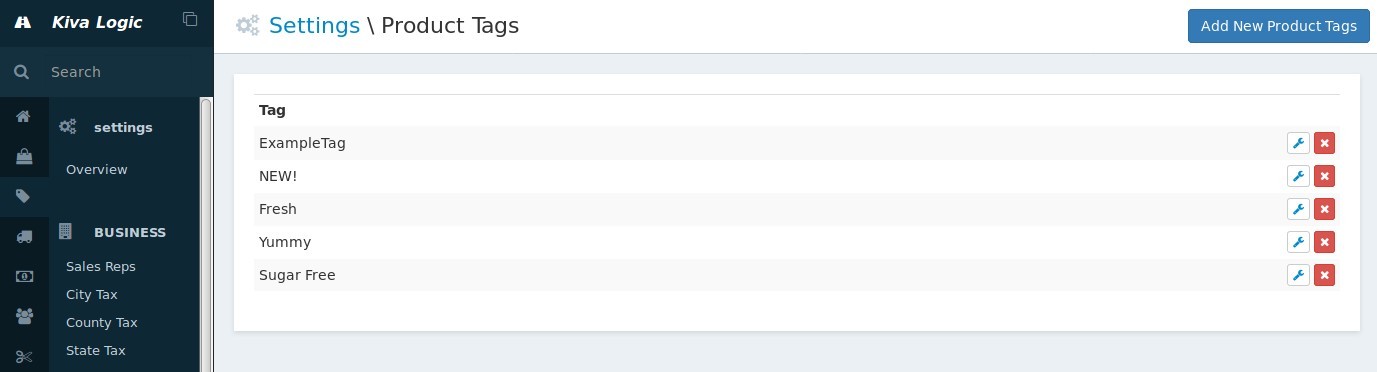
Tags are displayed in the shop and on product details pages. Each tag has an SEO friendly URL, for example "Yummy" could be found at the url https://kivalogicdemo.kivalogic.com/shop/tag/yummy
Prod Reports
Quantities
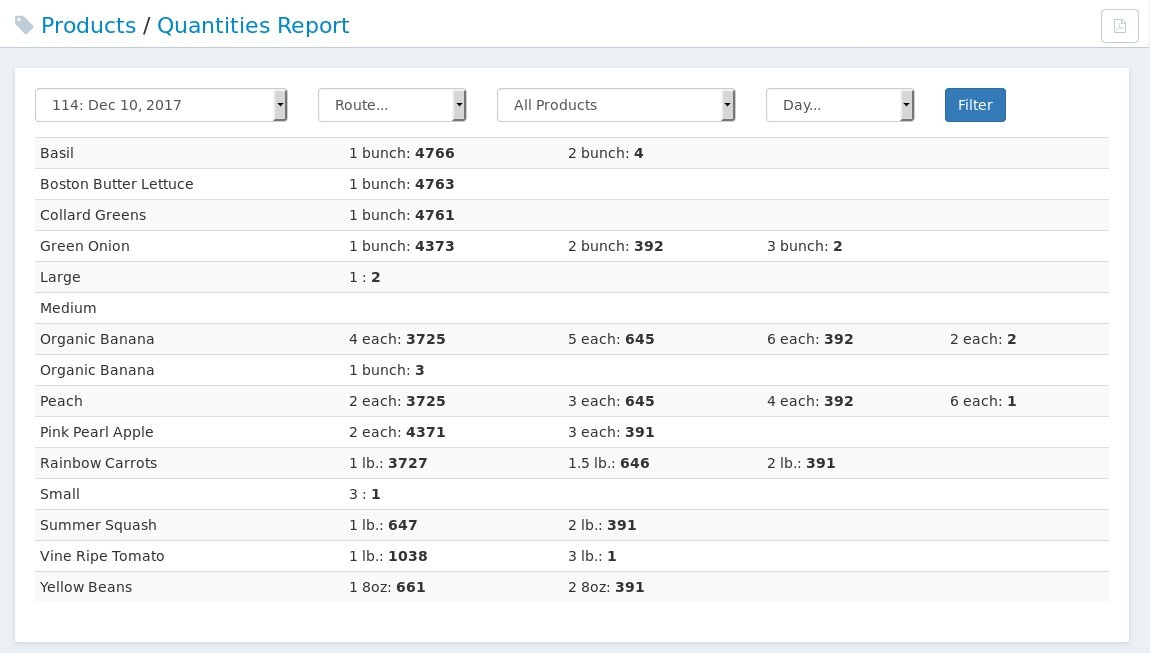
The Quantities Report will tell you how many of each quantity you need. For example, in the image below we have the product "Rainbow Carrots", which are available by the lb. (pound).
For this week, I can tell that I will need 391 "2 lb", and 646 "1.5 lb" of Rainbow Carrots.
USE CASE If you have something that needs to be weighed out prior to packing your boxes, like green beans, it's very useful to know how many bags of "1lb" green beans you have to make, and how many bags that weigh 2lb you have to make.
Order Wholesale +/-
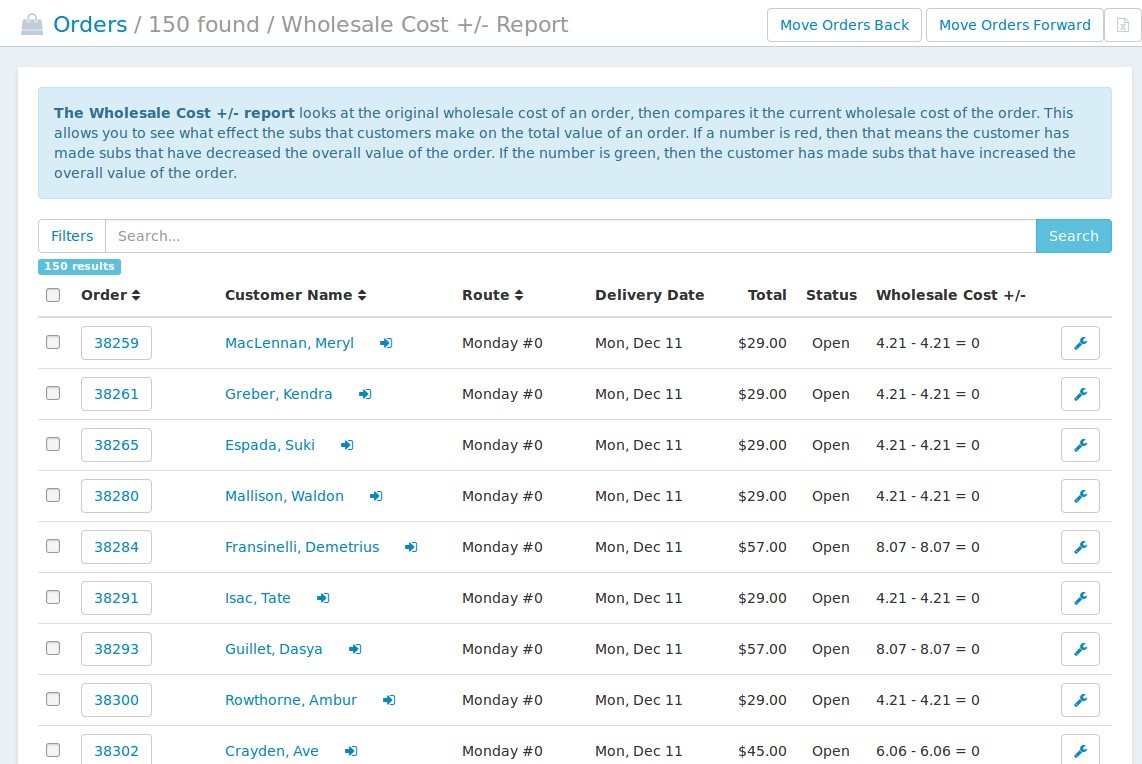
The Wholesale Cost +/- report looks at the original wholesale cost of an order, then compares it the current wholesale cost of the order. This allows you to see what effect the subs that customers make on the total value of an order.
If a number is red, then that means the customer has made subs that have decreased the overall value of the order. If the number is green, then the customer has made subs that have increased the overall value of the order.
Settings
Parent Classifications
Parent Classifications are what all your different products fit under. This is used by the preferences feature, the sub feature, and is also used to organize products on the admin side.
Master Classifications
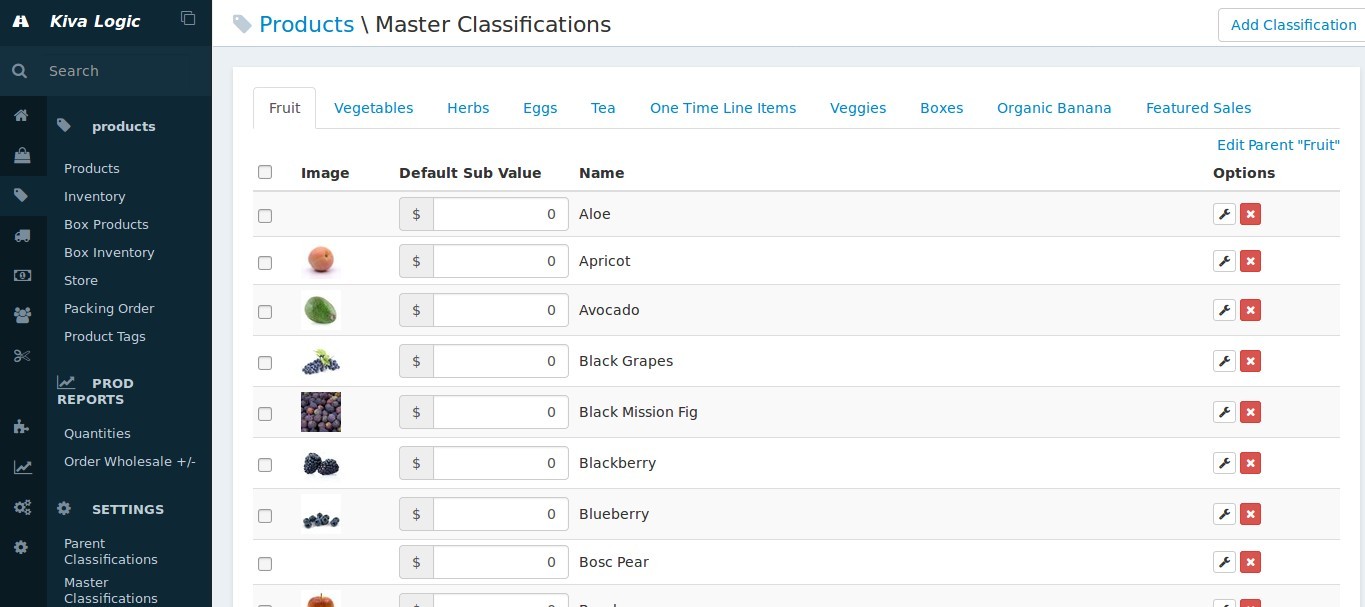
Each product you have will have a 'Master Classification'. Once you add a master classification, it will always be there, regardless of whether the actual product was a 'this week only' product or a recurring product. This is useful because then you only have to upload images for each product once! This is also used by the subbing and preferences feature to know what items a customer likes and doesn't like.
Distributers
Distributors are used on the admin side to help divide and separate your inventory by distributor.
Vendors & Farms
Each product can be linked to a vendor or farm.
Vendors and farms help you show customers where your products come from. If enabled, the vendors will be displayed on the vendor page, and farms on the farm page. You can set what vendor or farm a product comes from by editing the product, and selecting it from the drop down called 'Vendor/Farm'. If a product has a vendor/farm linked to it, this information will become visible in the shop, and on the customer home page where they view their order.
To enable or disable vendor/farm settings, go to the Products page, click on the wrench at the top right, and then click settings.
Units
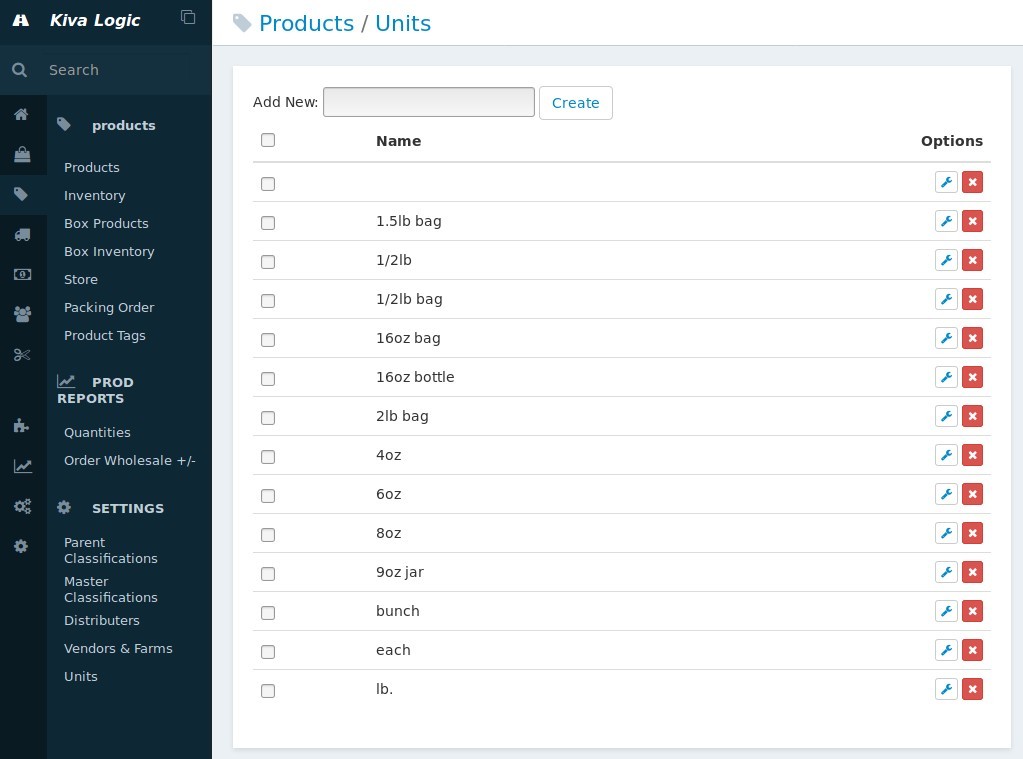
All the different units! Add or edit them here.