The Weekly Cycle for Your Delivery Week
The Kiva Logic software operates on a weekly cycle. If you have a box menu that does not change, or if you only sell products a la carte, then the weekly cycle is automatic. For the rest of us, read on!
There are three main operational components to each delivery week:
The weekly cycle
Processing Payments
- Routing and printing labels/driver sheets
The Weekly Cycle
When it's time to start a new week, a notification will pop up on your dashboard:
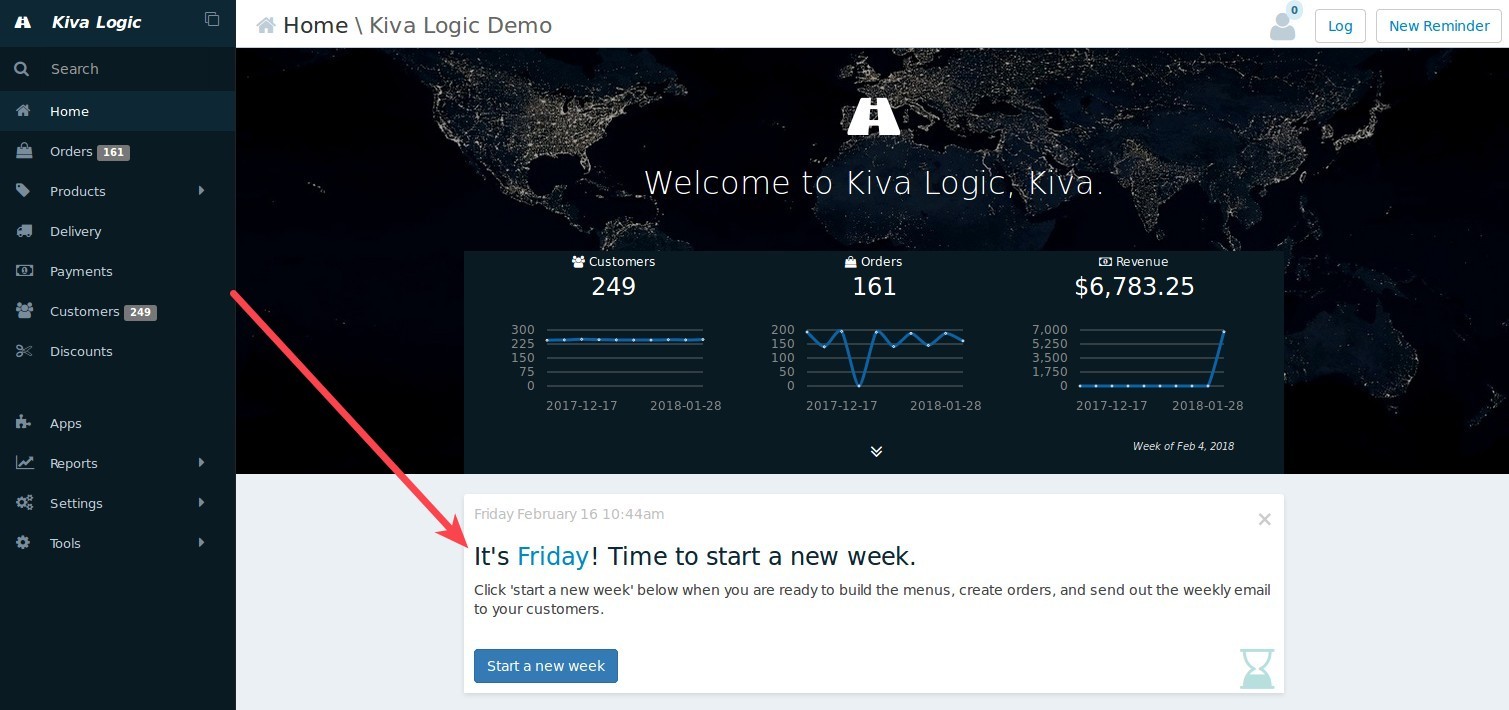
Text: "It's Friday! Time to start a new week. Click 'start a new week' below when you are ready to build the menus, create orders, and send out the weekly email to your customers."
When you click the button "start a new week", a new week will be started and you'll be taken to the weekly cycle overview page. Now you are ready to start on step 1!
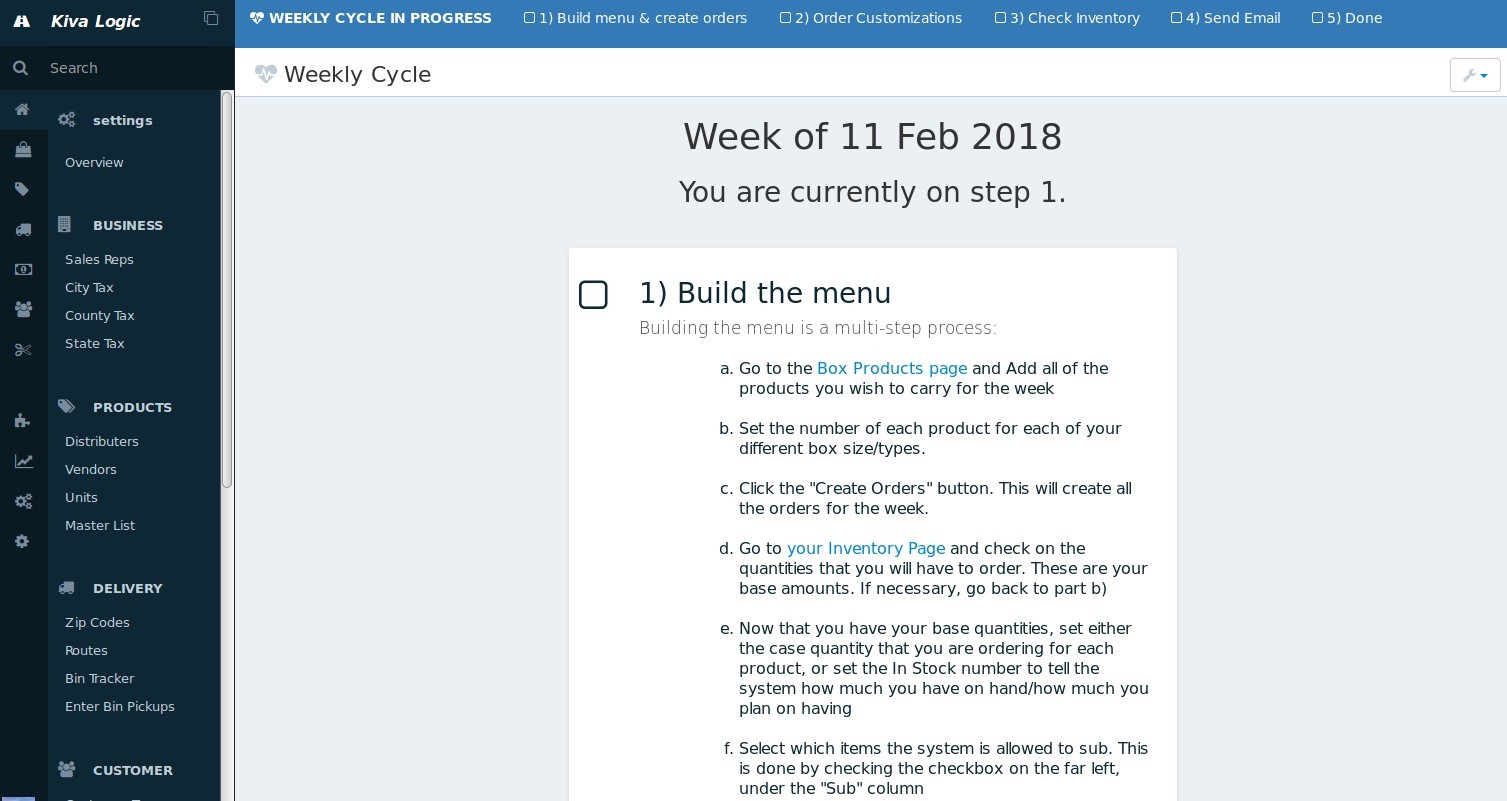
You'll also notice that there is a blue bar at the top of every admin page that signifies the weekly cycle is in progress.

Build the menu
Step 1 of the weekly cycle is to build your menu. This is the process of deciding what products are going to be in each box for the upcoming week. You'll gather all of your pricesheets from your farmer's, vendors, and distributors, and pick what you want to carry for the week.
Here is the process:
- Go to the Box Products page and Add all of the products you wish to carry for the week. You'll notice there are some additional helpers on the Box Products page to guide you!
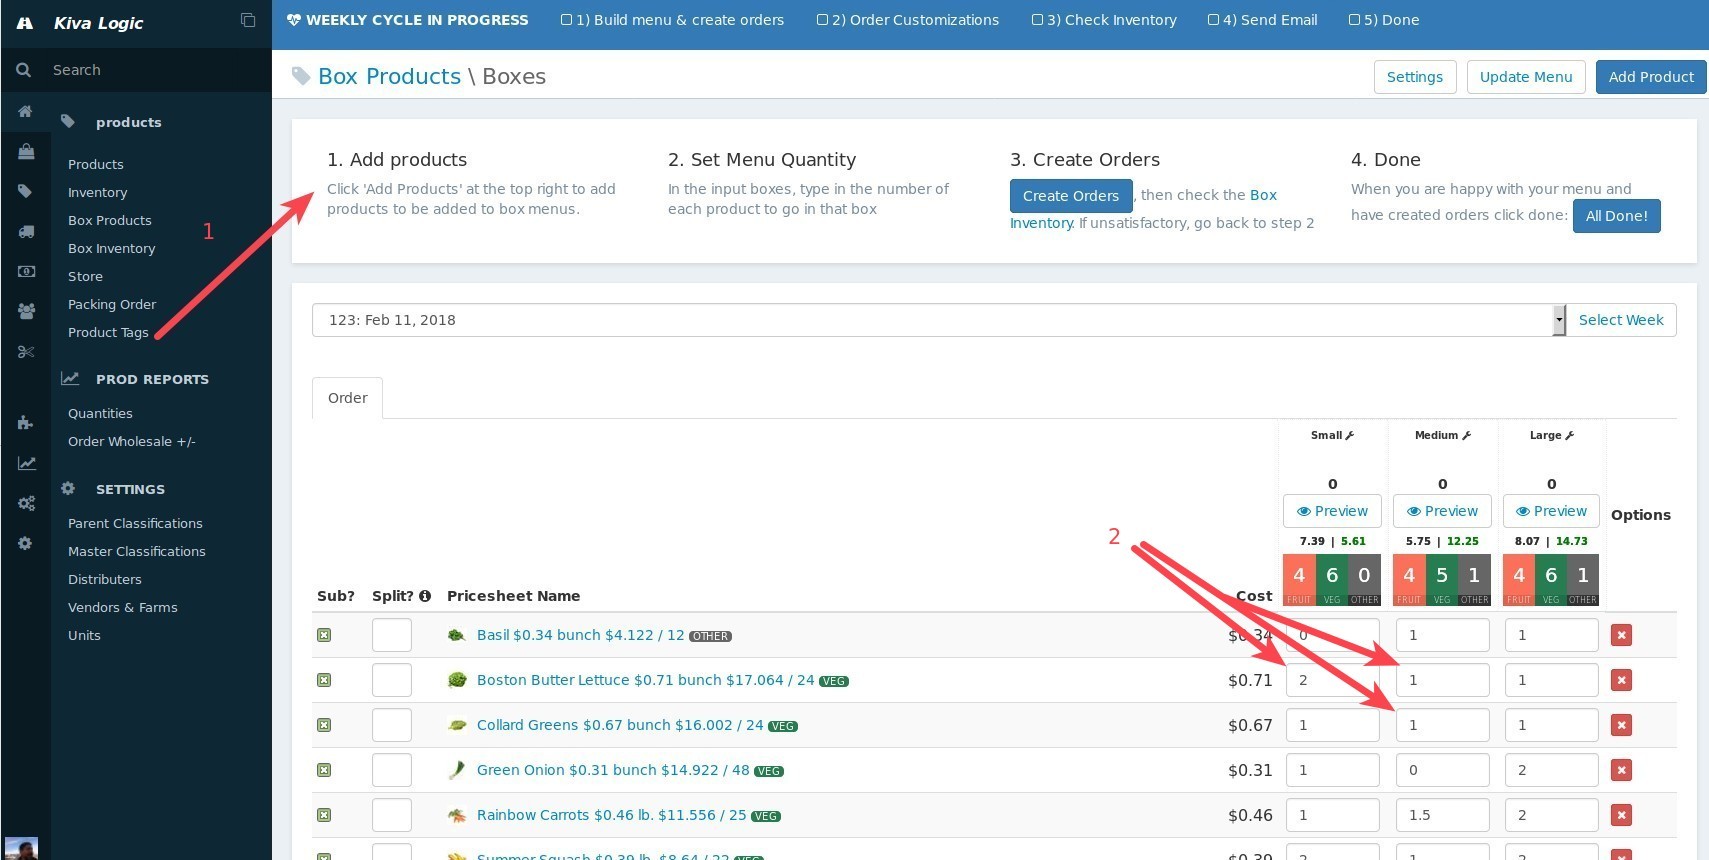
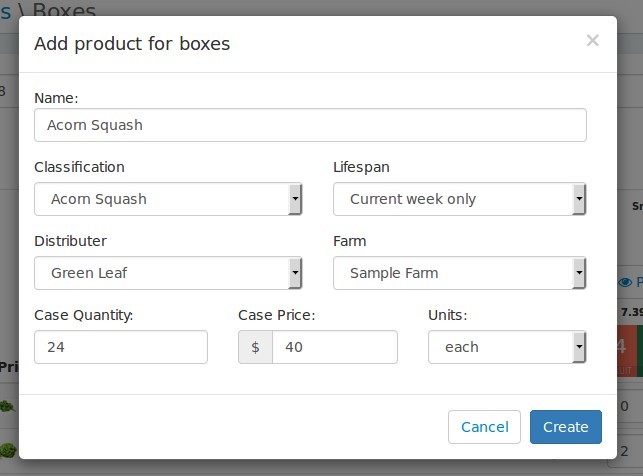
To add a product, click the button at the top right that says 'Add Product'. Make sure you add products that are only for the current week through the Box Products page, and make sure you have the lifespan set to 'Current Week Only'.
Set the number of each product for each of your different box size/types. In the screenshot above, we have decided to put 1 Green Onion in each of our "Small" boxes, and 2 Green Onions in each of our "Large" boxes.
Click the "Create Orders" button. This will create all the orders for the week. When orders are created, the system will look at each customer's schedule to see if they need an order or not. Then it will create an order and try to make appropriate subs for items they have on their 'no' list.
Go to your Inventory Page and check on the quantities that you will have to order. These are your base amounts. If necessary, go back to part 2 if you want to make any changes.
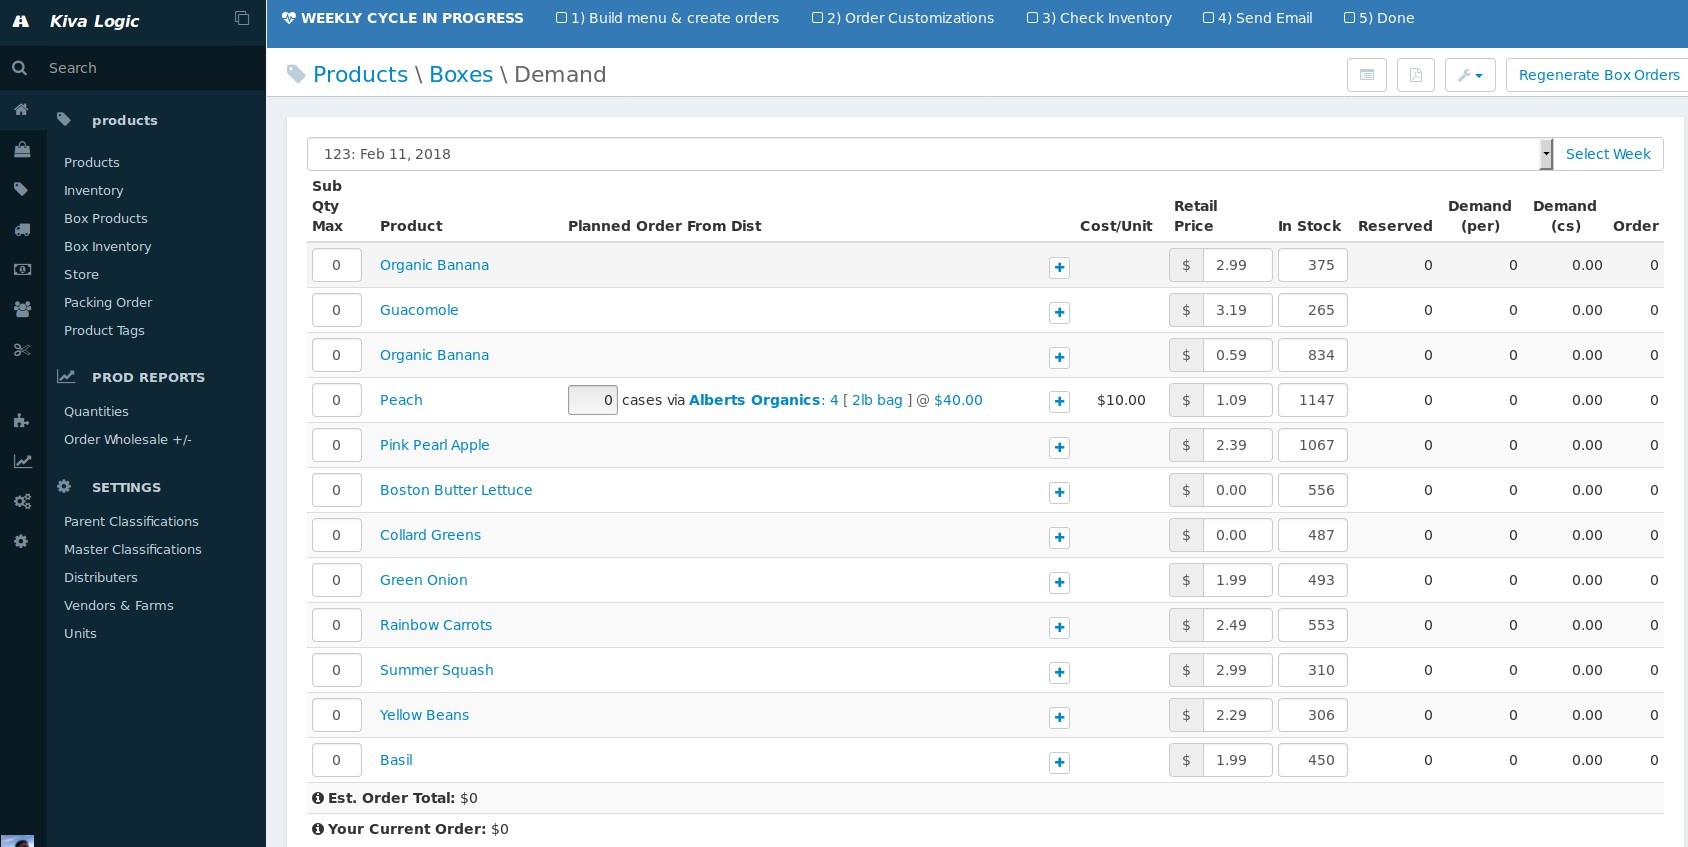
- Now that you have your base quantities, set either the case quantity that you are ordering for each product, or set the In Stock number to tell the system how much you have on hand/how much you plan on having
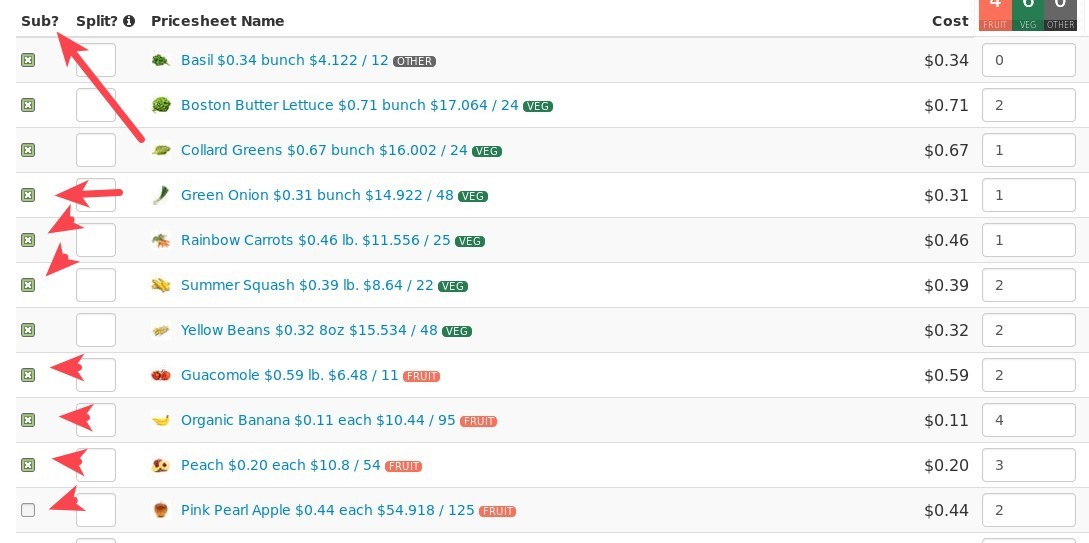
- Select which items the system is allowed to sub. This is done on the box products page by checking the checkbox on the far left, under the "Sub" column
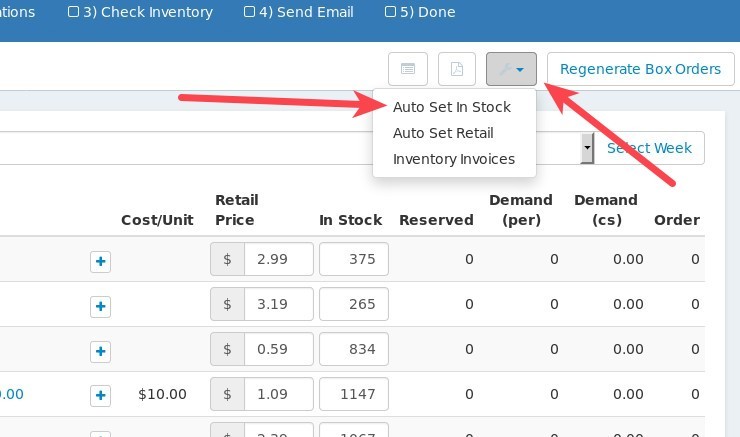
- If you have manually set the "in stock" numbers, proceed to the next step. Now set the safety percentage you would like to have on hand in the field labeled "Auto Set Number In Stock", then click that "Auto Set Number In Stock" button. This takes the amount of cases that you have ordered, subtracts the current demand, and sets the difference minus the safety percentage as the number in stock for each item. To do this, go to your Box Products page, then click on the wrench at the top right.
Now that you have set your inventory and subs, go back to the box products and click "Regenerate Orders". This time the system will make subs!
Check your inventory, and if necessary, you may go back to step 2) to adjust your menu
- Are you happy with the menu? Then you are done! Otherwise, go back to step 5) to adjust the menu, or go back to step 2) to adjust the quantities.
Once you are done with the menu, click on "All Done!" on the Box Products page.

Congratulations, you are done with step 1! It gets easier from here!
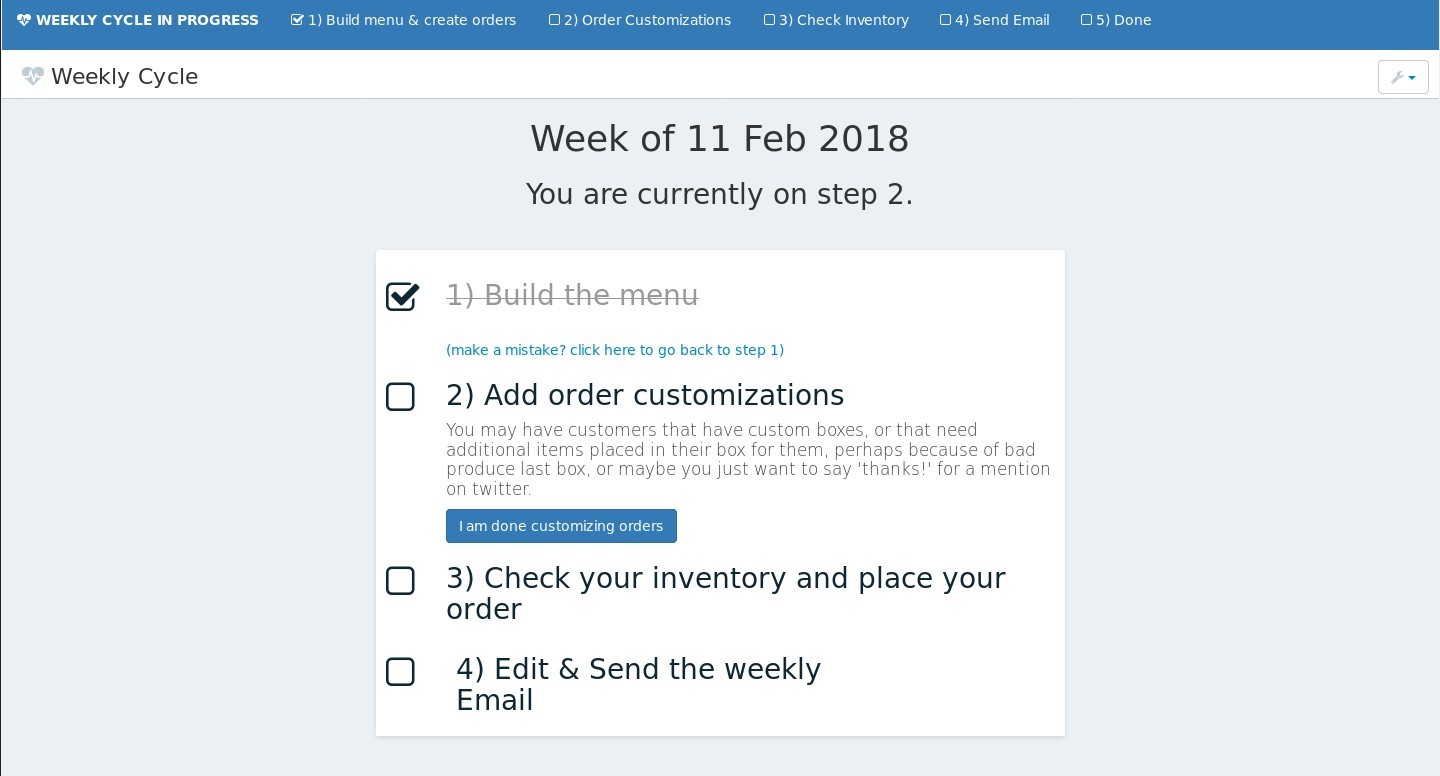
Add order customizations
You may have customers that have custom boxes, or that need additional items placed in their box for them, perhaps because of bad produce last box, or maybe you just want to say 'thanks!' for a mention on twitter. This is the time to do it. When you are done, navigate back to the weekly cycle page and click 'I am done customizing orders'.
Check your inventory and place your order
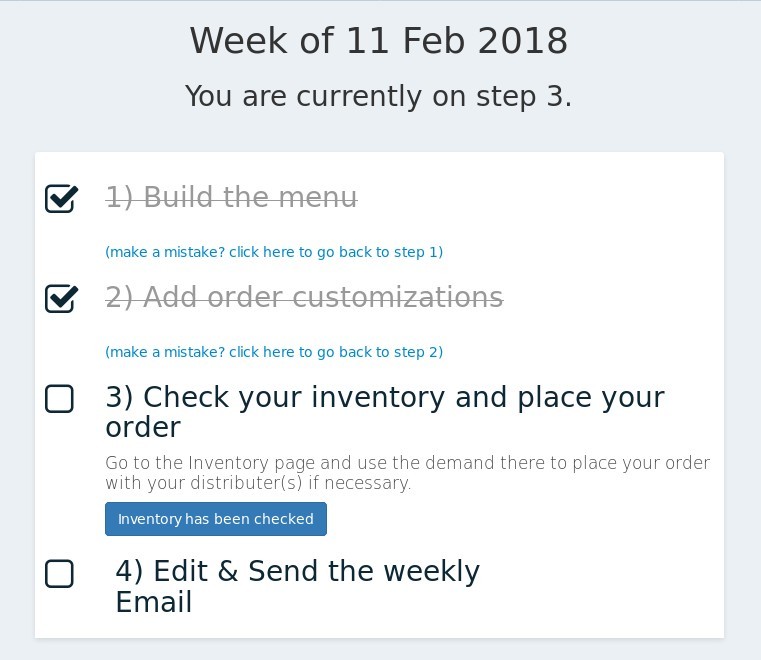
Go to the Inventory page and use the demand there to place your order with your distributer(s) if necessary. When you are done, click the button that says 'Inventory has been checked'.
Edit & Send the weekly email
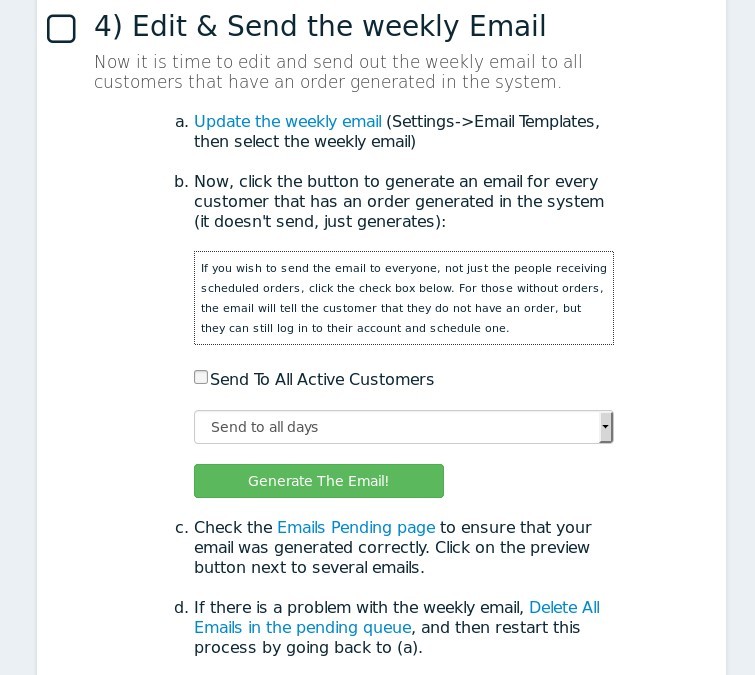
The weekly email is used to let customers know that their order is ready for them. This tells them that they can log in, make subs, shop for add-ons, and also is a great place to tell people what is going on with your business that week, local happenings, or special sales you are running.
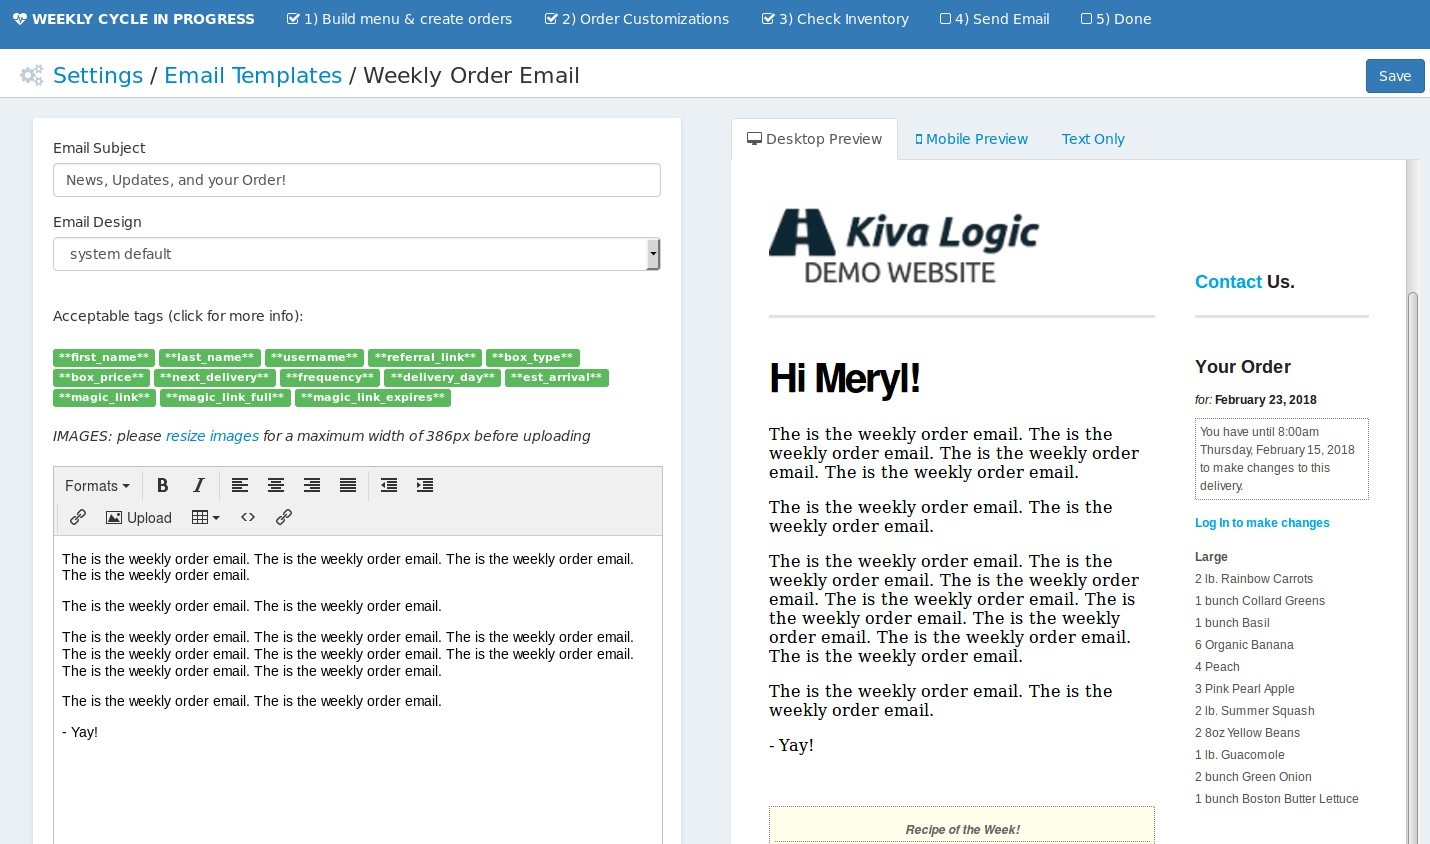
- Update the weekly email (Settings->Email Templates, then select the weekly email). After you make your changes, click 'Save', and then click on the blue bar at the top to return to the weekly cycle overview page.
Now, click the button to generate an email for every customer that has an order generated in the system (it doesn't send, just generates). This will fill up your email queue.
Check the Emails Pending page to ensure that your email was generated correctly. Click on the preview button next to several emails.
- If there is a problem with the weekly email, Delete All Emails in the pending queue, and then restart this process by going back to (1).
If for some reason you forget to generate the weekly email, there will be a notice above the 'I am done' button to let you know:

By default, the weekly email is only sent to customers that have an order, but if you want to send it to ALL of your active customers whether they have an email or not, check the box that says 'send to all customers.'
Send a Push Notification
If you have our Android and iOS apps set up, you'll see section that will allow you to ALSO send out a push nootification to all customers who are scheduled to receive an order this week:
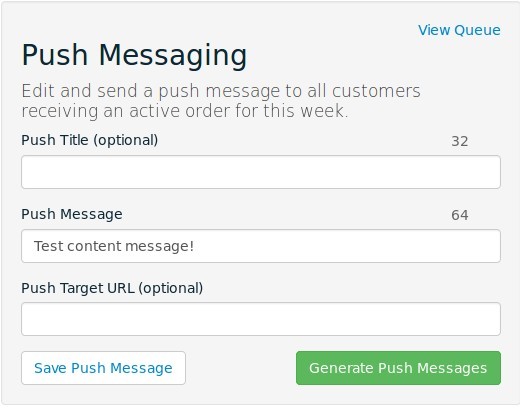
Just fill in the title (optional), and the push message content, save your message, and then click the button that says 'generate push messages'. This will send a notification to every customer that has installed the app!
Done!
Once you have completed all 4 steps of the weekly cycle, click the button that says 'I am done! Email has been generated'. This will officially allow customers to start shopping and subbing and completes the weekly cycle.
Now you can go about your business- there is nothing else you have to do until the next week.
Processing Payments
Typically, the day before delivery is when you want to run your billing. To do so is a simple process:
Go to the billing page
- Click the button that says 'Create Transactions'. This will go through all orders that have been locked in for the week, calculate any discounts, coop discounts, promos, etc, to create a transaction record for each order.
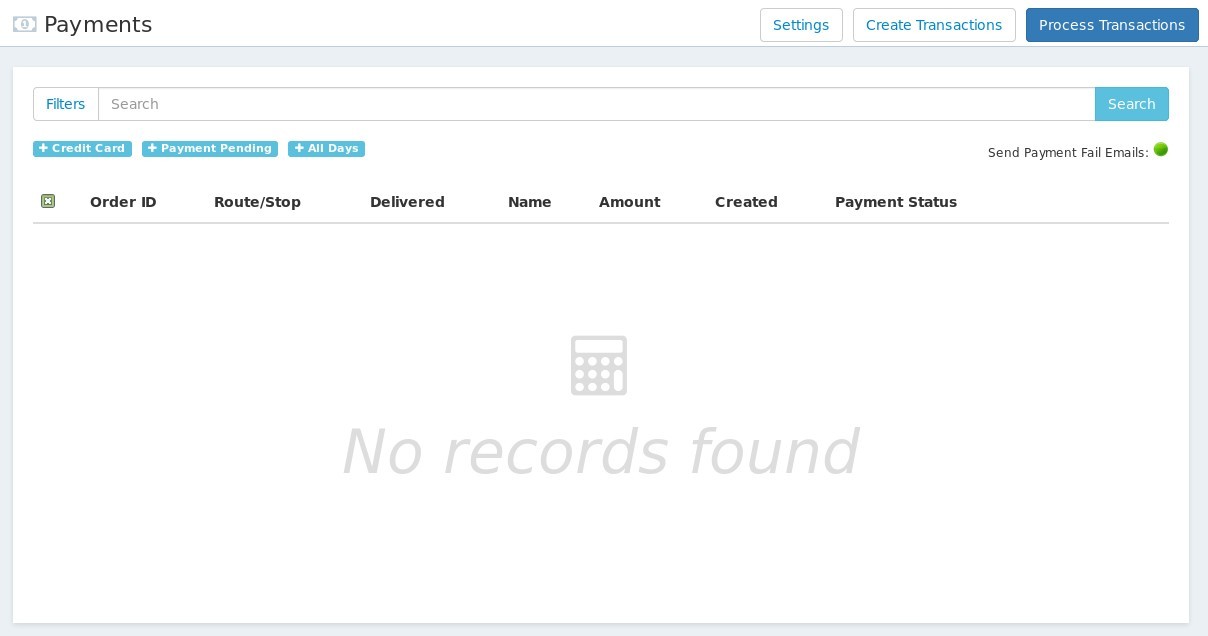
- Now that you have created your transactions, just click 'Process Transactions' and watch as each transaction is sent off to your payment processor. If a payment is successful, the customer will receive a receipt email, and if it fails, they will receive an email asking them to update their payment info. You can edit both of these emails from the Email Template page.
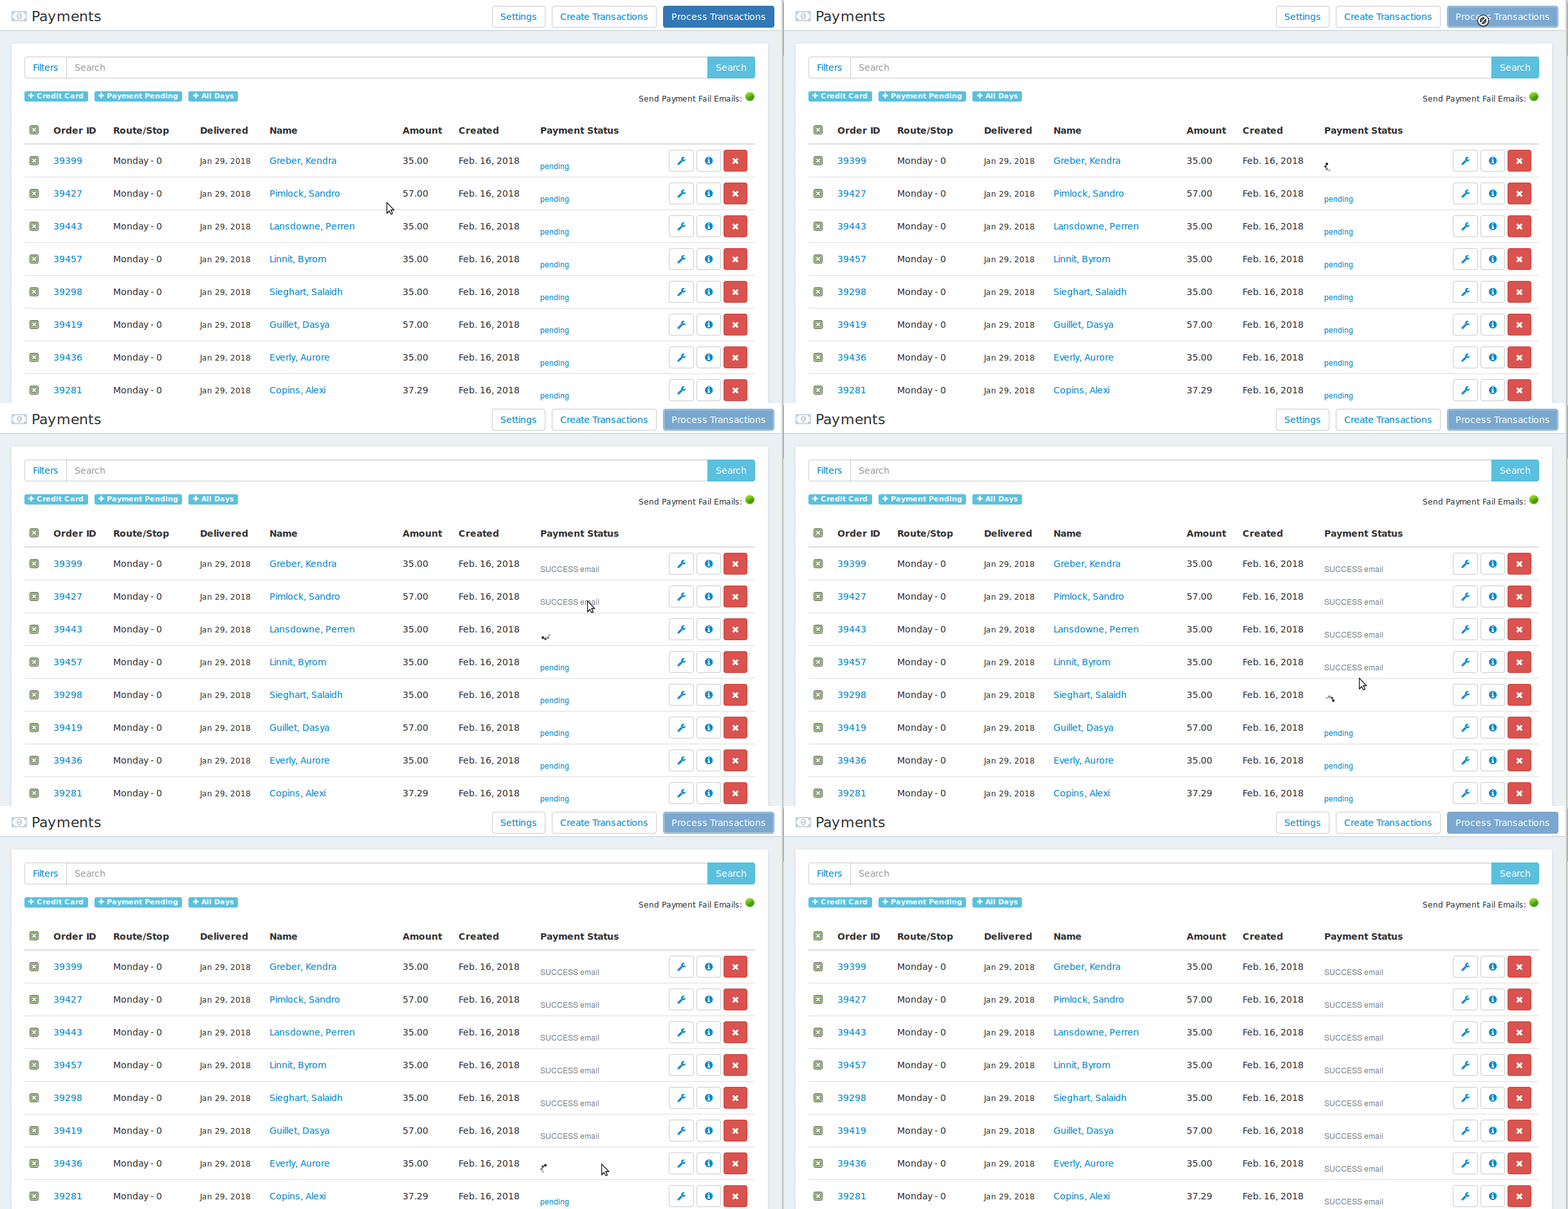
Congratulations! You just ran billing!
Routing and printing labels/driver sheets
The day before deliveries, you'll need to prepare your routes. To do so:
Go to the delivery page
Update your routes and stop numbers
Download a PDF of your Labels
- Download a PDF of your Driver Sheets.
That's it! Here is some more information on the delivery page
Repeat!
That's the weekly cycle in a nutshell. The system will help you along the way, and it will even display messages on your dashboard when it's time to prepare your routing.
